Step 1: Validating with Templates
Templates are reusable across both OneSchema Importers and OneSchema FileFeeds, and are thus a core part of any OneSchema deployment.
Creating a template
To get to your templates, go to your OneSchema portal and select Templates from the menu bar at the top of the page. An example Contacts template is provided.
The steps for creating a template are as follows:
- Create a new template and add the relevant columns + their rules
- Rename the template and template key
- Push changes to the template
Manually
In the upper right hand corner of the templates page, select New template, then click Build a template from scratch in the window that pops up. A blank template will be created and columns can be added one by one.

Locate this button on your OneSchema dashboard
From a clean spreadsheet
In the upper right hand corner of the templates page, select New template, then upload a pre-cleaned spreadsheet file in the window that pops up. The clean spreadsheet file should contain headers (must be first row) and clean sample data in the format your application can accept. OneSchema will intelligently scan the data in order to automatically determine the headers and datatypes.
Editing a template
To edit a template, click on Details of the template you want to edit. Prior to changes taking effect, they must be pushed.
Adding a column
To add a new column, click Add a column in the top right of a specific template's page or at the bottom of the existing columns.
Locate this button on your OneSchema dashboard
Editing an existing column
To edit a column that already exists in a template, simply click on the pencil icon associated with that column. A column can be removed by clicking on the trash can on that column's row.
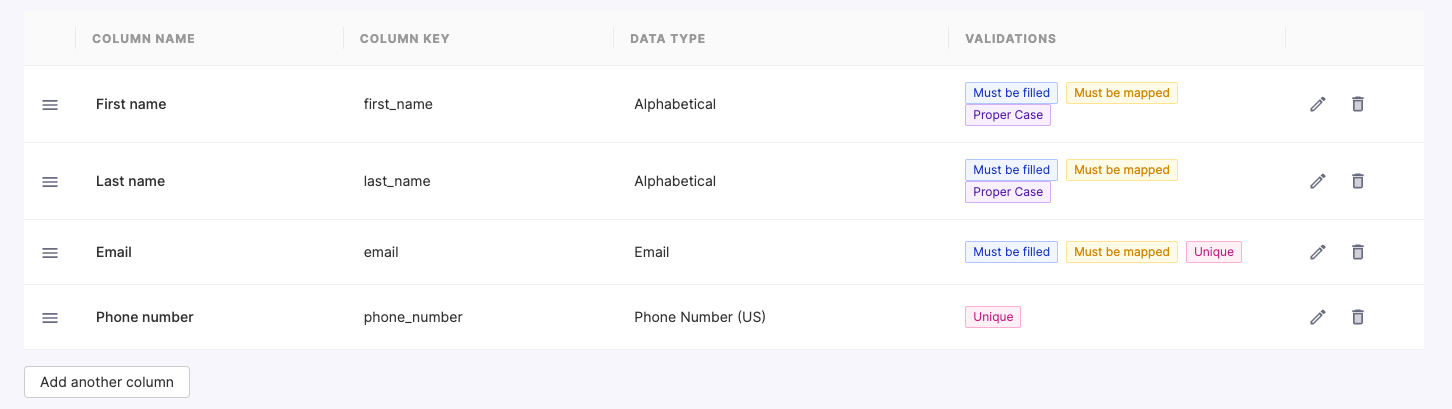
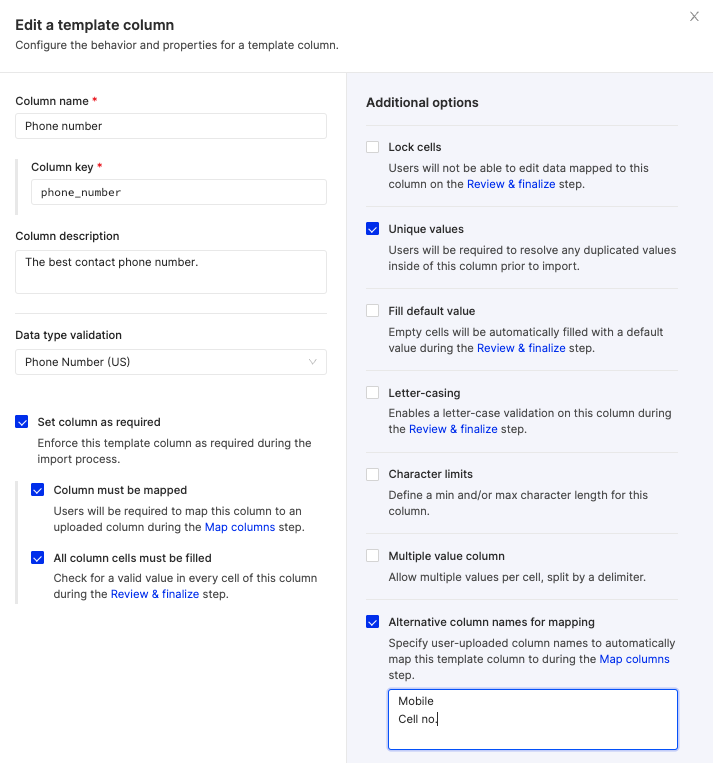
Column options
| Option | Description | ||
|---|---|---|---|
| Column template name* | The name given to the column during data validation and import. | ||
| Column key* | A unique identifier used to identify webhook columns instead of the column name. | ||
| Column description | A description of the column visible to the user. | ||
| Required | No cells in a column may be empty and the column must be uploaded and mapped by the end user. One or both can be selected. | ||
| Lock cells | Users will not be able to edit data mapped to this column on the Review & finalize step. | ||
| Unique values | Data in each cell of the column must be unique. No value can be used more than once. | ||
| Data validation type | The no-code data validation applied to the column. | ||
| Letter case | Select if text in the column should be in Proper Case, lower case, or UPPER CASE. OneSchema will auto-transform between the different casings. | ||
| Character limit | Lower and upper bounds for the number of characters in a cell of the column. | ||
| Multiple value delimiter | Allows multiple entries in a single cell, separated by the delimiter defined here. i.e. ;, ,, or |. | ||
|
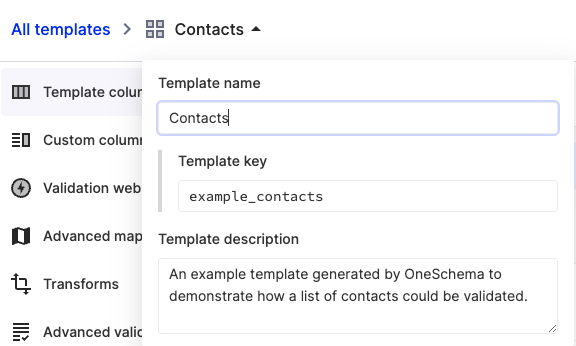
Changing a template's name
To change the name and/or the column key of a template, click on its name in the upper left hand corner when on the specific template's page. The changes will autosave when you click away.
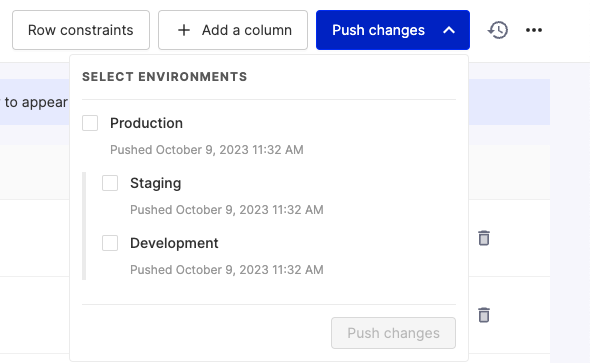
Pushing changes
After changes are made to a template, they must be pushed to the appropriate environment(s). The blue Push Changes button can be found in the upper right hand corner of the page. Select the appropriate enviroment(s) and click push. If Production is selected, an additional confirmation prompt will appear.
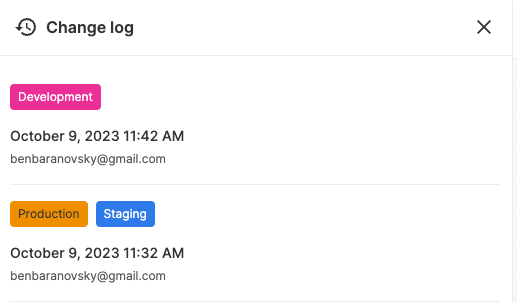
A changelog for pushes is provided to the right of the Push changes button (icon: clock inside a counterclockwise arrow).
Row Constraints
Settings for Row constraints can be found in the upper right corner of a template's page, just to the left of the Add a column button. A row constraint is a conditional check of one column's value based on the value contained in another. Each row is checked individually. For a given row, the check follows the form of: If column A contains X, then column B must contain Y, else surface an error.

Validation webhooks
A validation webhook is a way to validate data against a third-party data source, your database, or perform complex formulaic checks. OneSchema will pass the requested data via webhook to an endpoint you host, and simply expects to receive a list of errors and warnings in response. Please see our validation webhook API documentation.
A validation webhook is created for a specific template and associated to a template by clicking Add validation hook on the left-hand sidebar.
| Field | Description |
|---|---|
| Validation hook name* | A name so you can easily identify your webhook. |
| URL* | The URL of your endpoint. |
| Template column keys* | Select the columns you'd like passed to your endpoint. Only the selected columns will be sent. |
| Secret key | Optional, a way to ensure the call is authorized. |
|

Exporting and Importing templates
Exporting
A template can be exported by clicking the three dots in the upper right (just to the right of Add a column), and selecting Export template. A JSON file will be downloaded containing all configurations for that template.
Importing
A template can be imported by clicking Import template in the upper right corner to the left of New template. Select a template configuration JSON file to upload.
Duplicating a template
Templates can be duplicated page by clicking Duplicate on a specific template. This is useful for testing changes without overwriting a template or for creating a similar, but slightly different template.
Deleting a template
A template can be deleted by clicking the three dots in the upper right (just to the right of Add a column), and selecting Delete template.