Step 2: Embedding the Importer
Use our Javascript, React, Angular, or Vue SDK for embedding into your front-end web application.
This guide will help you embed an importer in your application using a provided code-snippet.
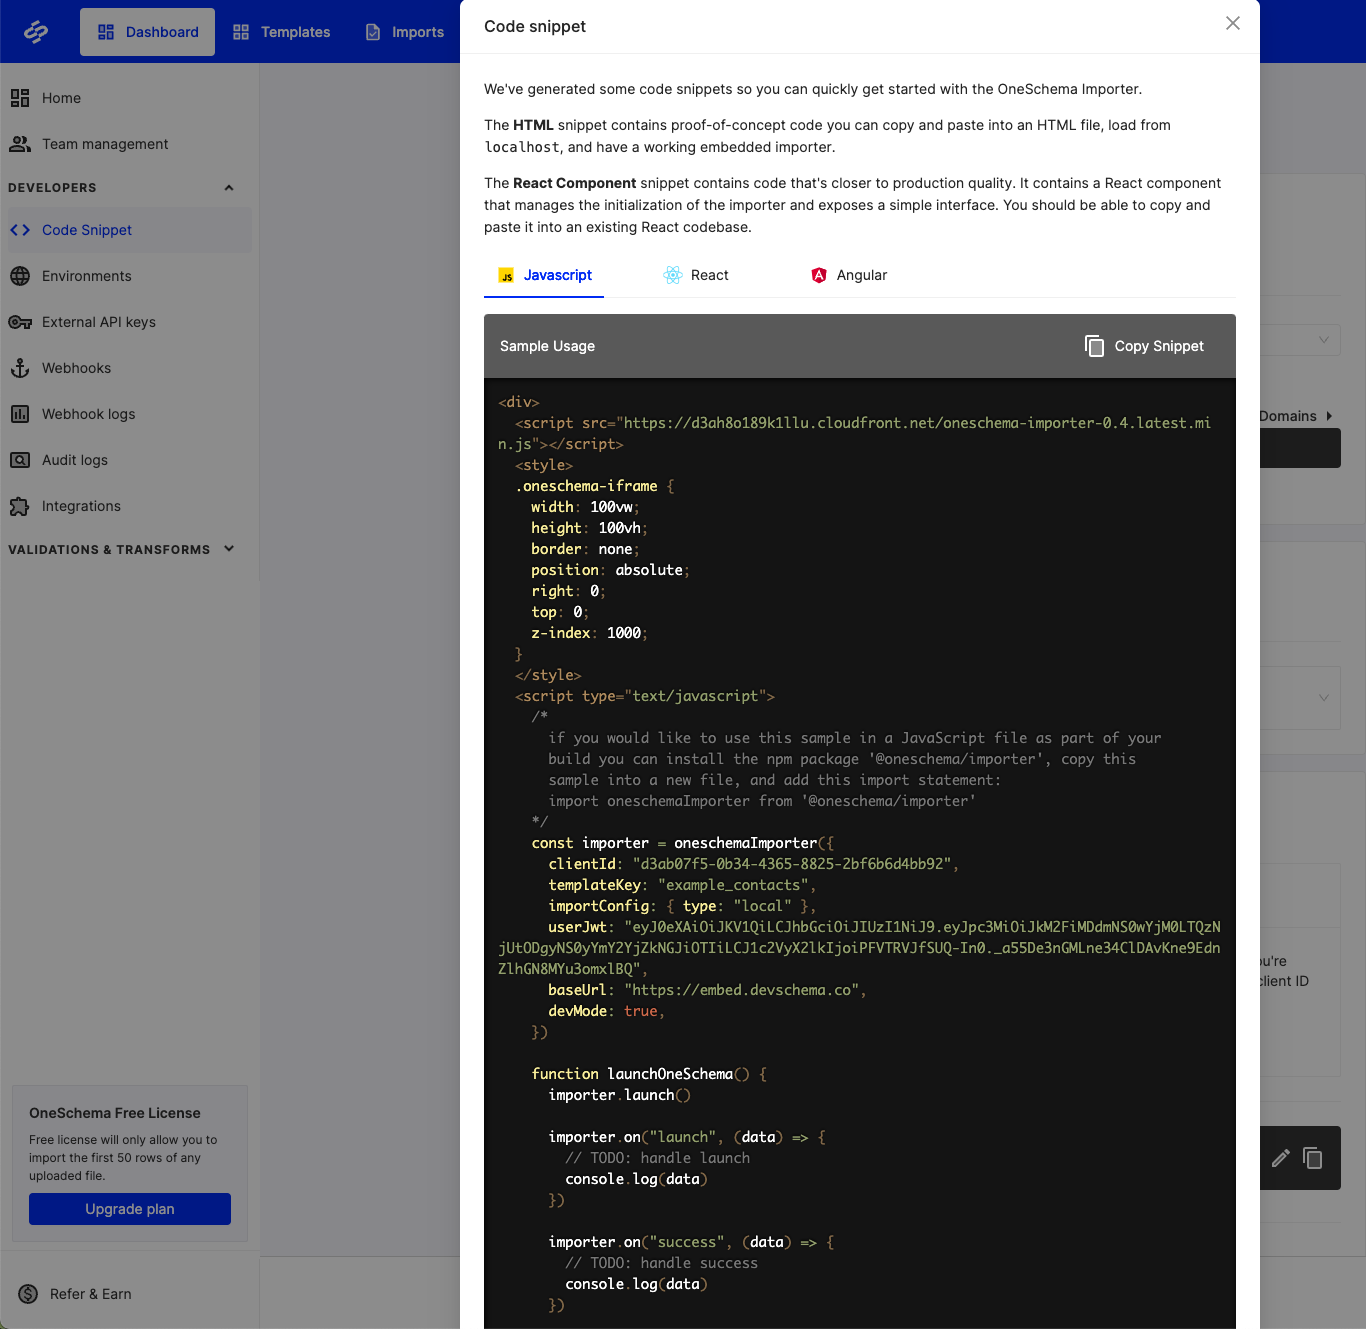
Generate a Code Snippet
- From the main Dashboard, navigate to Code Snippet under the
Developerssection in the left sidebar.

- Ensure that the Development environment is selected in "Step 1".
- Select the template you'd like to use in "Step 2".
- Click Generate Snippet in the bottom right corner.
Note: a JWT is auto-generated for you in "Step 3". More on this later.
Using the code snippet
- Note the tabs for
React,Javascript, andAngularand select your desired language. - If relevant, install the package using NPM.
- Paste the code snippet into your application and click the provided button to launch the OneSchema Embedded Importer.
Using Other OneSchema Environments
By default the development environment allows OneSchema to be embedded on any page. Other environments like Staging and Production require an Allowed Domains list, essentially a "whitelist" of where OneSchema can be embedded.
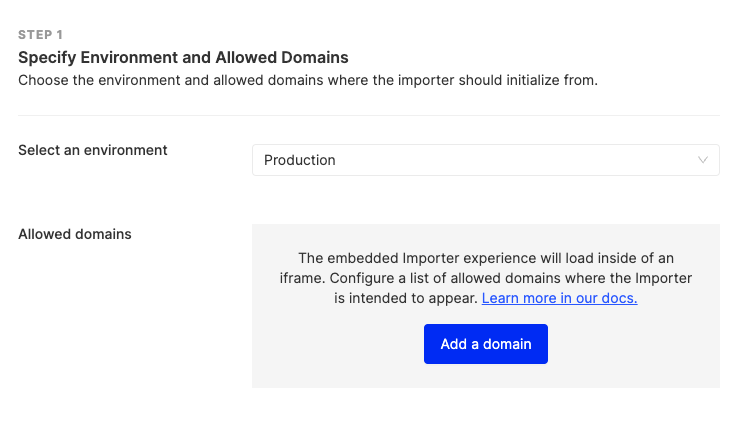
Click Add a domain to set up your domain(s) list. Note that OneSchema assumes https:// so http:// needs to be specified when appropriate.