
Enterprise SSO
How to enable SSO (e.g. Okta or Microsoft Entra ID) authentication to OneSchema for your organization
Please contact your OneSchema representative for more info on enabling SSO for your organization.
OneSchema supports single-sign-on (SSO) and Security Assertion Markup Language (SAML) authentication to manage authentication and access to the OneSchema dashboard.
When you set up a SAML authentication method, only users in your organization's identity provider will be able to log into to the application. By default, all other authentication methods will be disabled.
All SAML SSO configurations support "Just In Time" (JIT) provisioning, which allows OneSchema to create users when they log in for the first time.
We support several identity providers including Okta, Microsoft, and Google.
Configuring Okta SAML / SSO
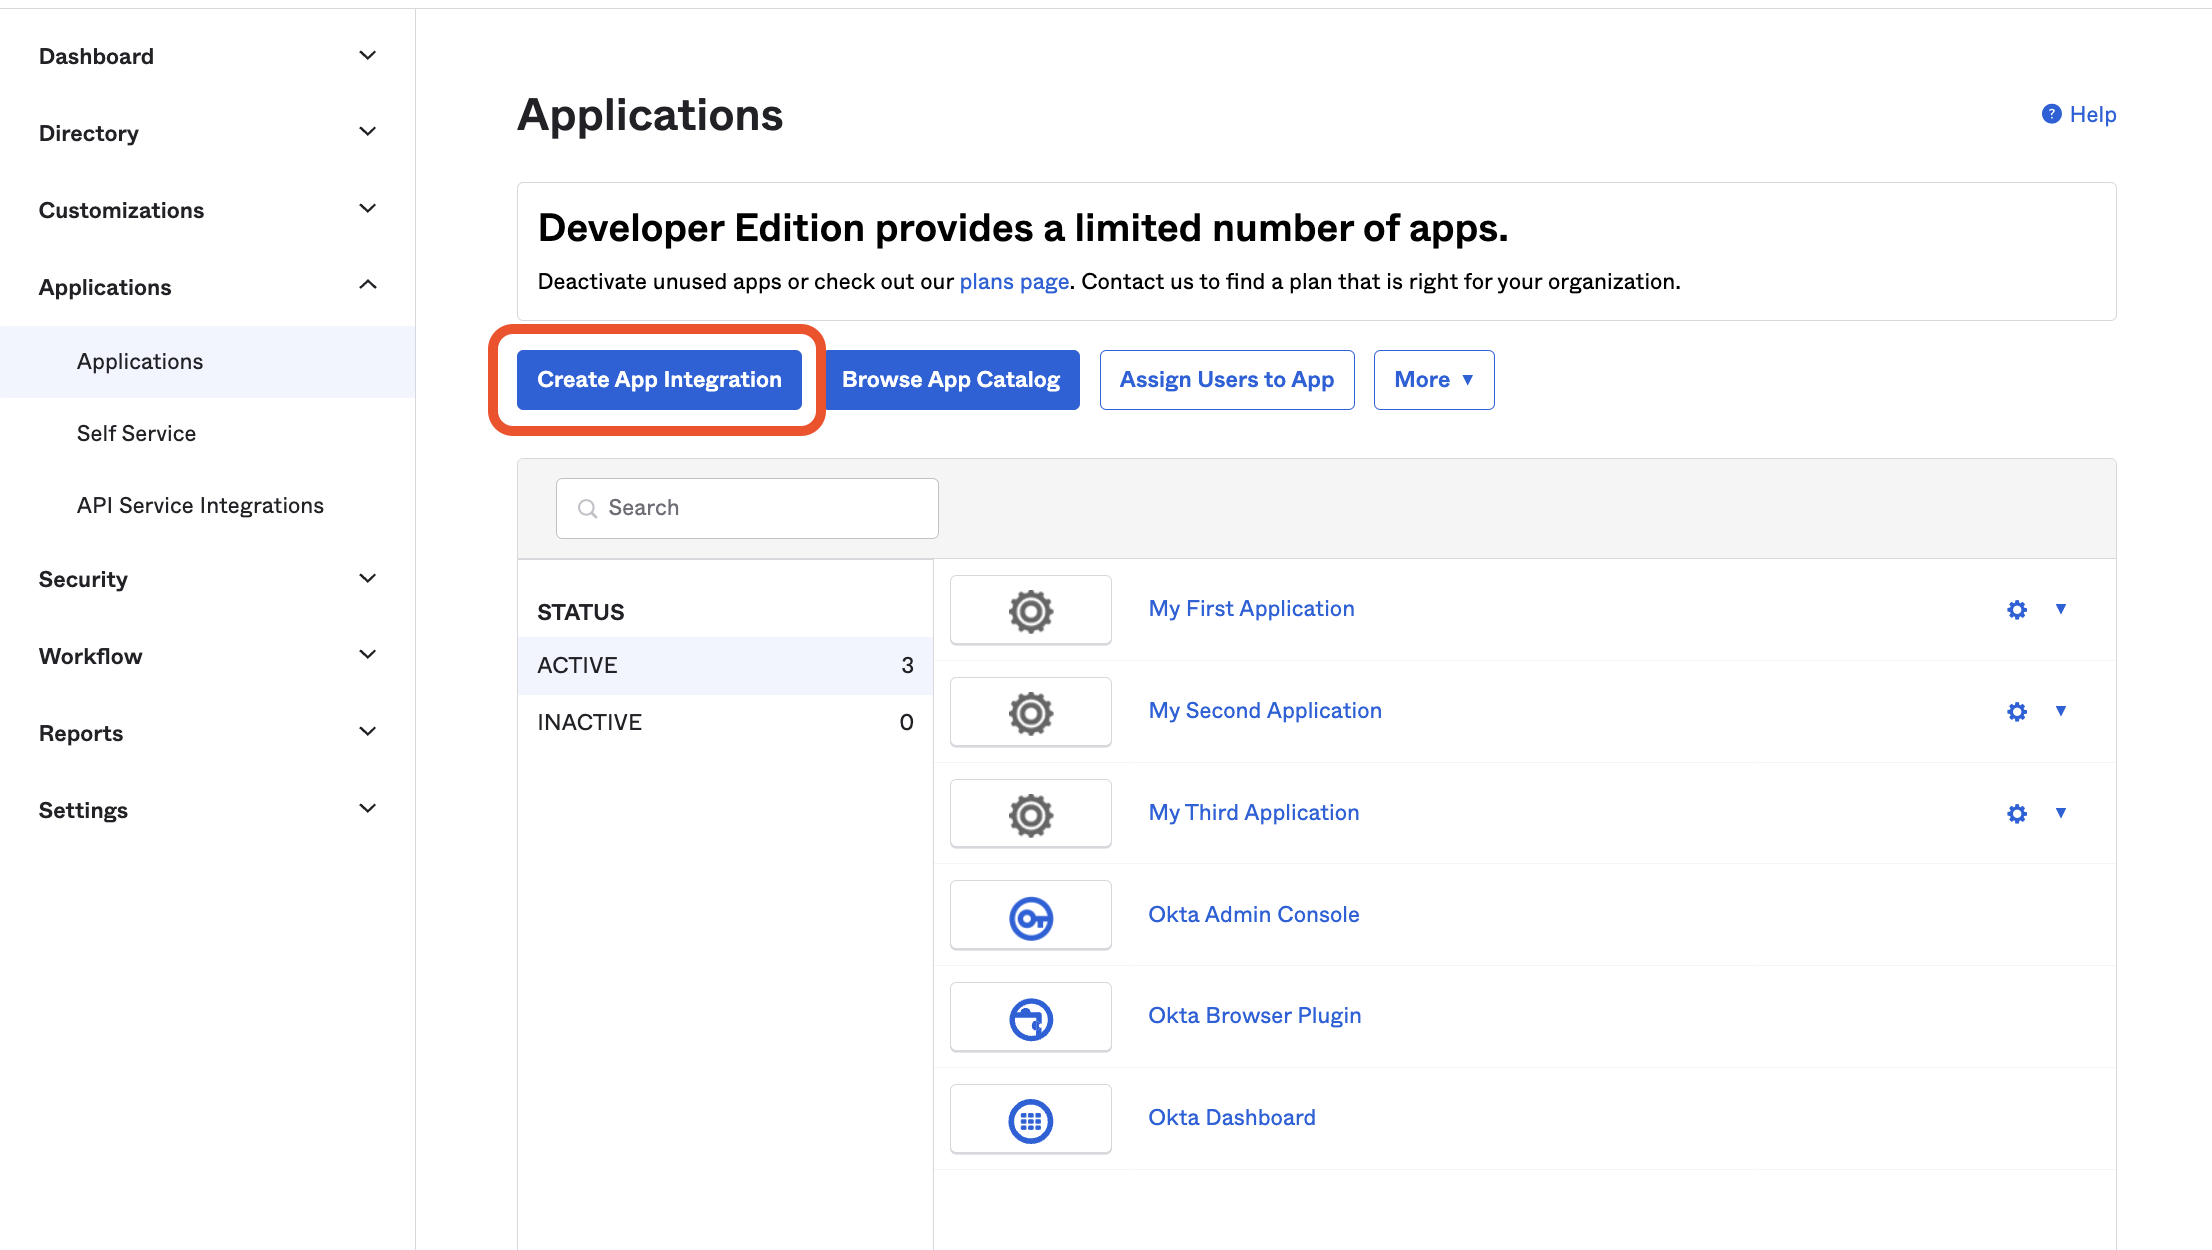
- From the Okta Admin Dashboard, click Create App Integration in the Applications tab
- Select SAML 2.0 and continue to the the General Settings form, enter the name of your application as OneSchema.
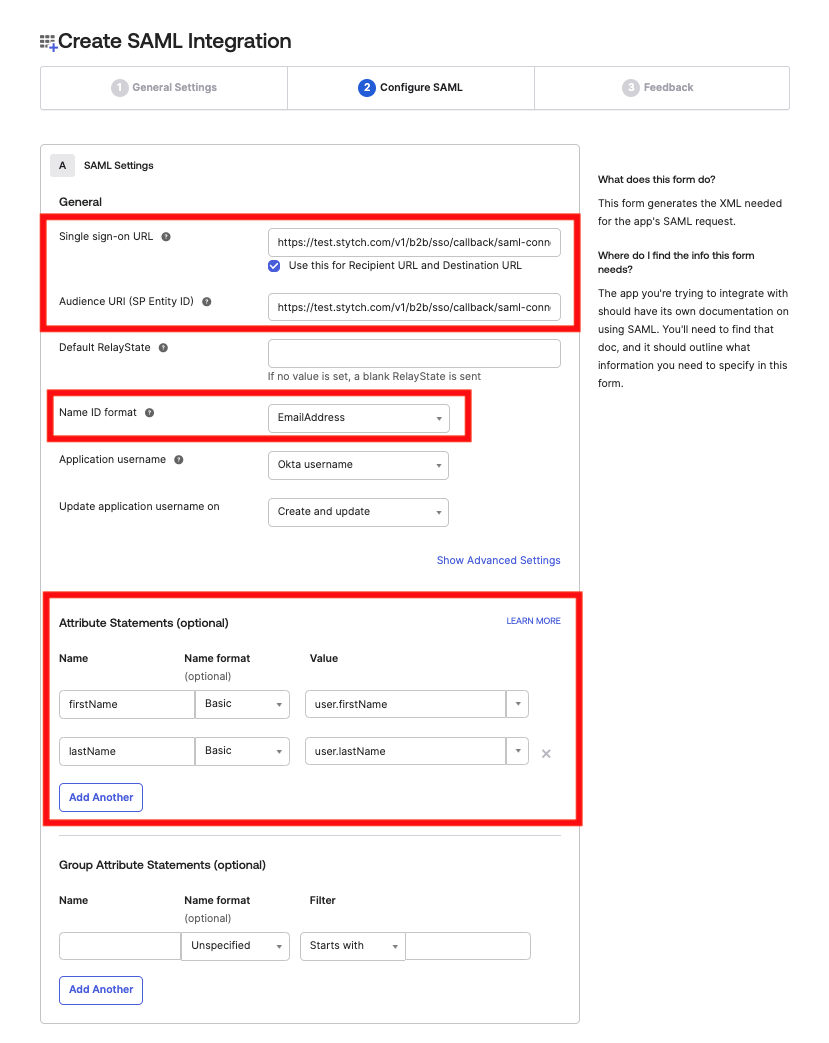
- In the Configure SAML form:
- Input the
acs_urlas the Single sign-on URL. This will be provided by your OneSchema representative. - Input the
audience_urias the Audience URI (SP Entity ID). This will be provided by your OneSchema representative. - Select EmailAddress for Name ID format
- In Attribute Statements create two inputs:
Name: firstName; Name format: Basic; Value: user.firstName
Name: lastName; Name format: Basic; Value: user.lastName
- Input the
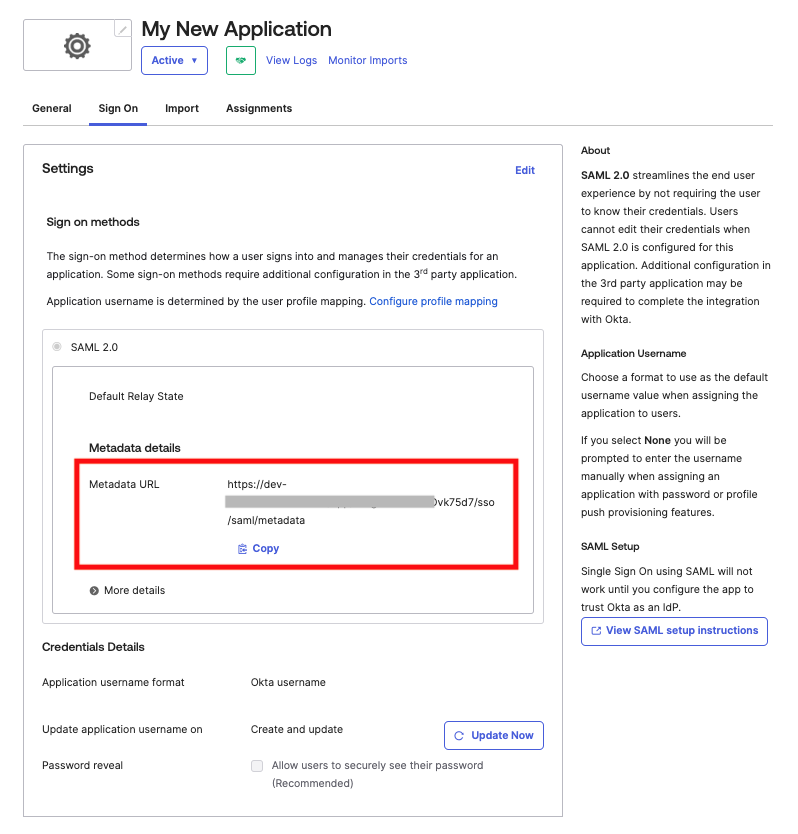
- Save and continue, indicating that this is an internal application on the last screen. Copy the Metadata URL from the Sign On Settings tab in your newly created Okta application and share this with your OneSchema representative.
Configuring Microsoft Entra ID SAML / SSO
- In the Microsoft Entra admin center, go to Enterprise applications and click New application, then Create your own application. Name the application OneSchema, select Integrate any other application you don't find in the gallery (Non-gallery), and click Create.
- In the new application, open Single sign-on and select SAML.
- Edit Basic SAML Configuration:
- Input the
audience_urias the Identifier (Entity ID). This will be provided by your OneSchema representative. - Input the
acs_urlas the Reply URL (Assertion Consumer Service URL). This will be provided by your OneSchema representative. - Leave the other fields blank and click Save.
- Input the
- Edit Attributes & Claims:
- Under Required claim, open Unique User Identifier (Name ID) and set the Source attribute to
user.primaryauthoritativeemail(oruser.mail). The Name ID must be the user's email address; the defaultuser.userprincipalnameis often not an email address and will prevent users from logging in. - Under Additional claims, delete the preconfigured claims and add the following three claims, leaving Namespace blank:
Name: firstName; Source attribute: user.givenname
Name: lastName; Source attribute: user.surname
Name: id; Source attribute: user.objectid - Click Save.
- Under Required claim, open Unique User Identifier (Name ID) and set the Source attribute to
- In the SAML Certificates section, copy the App Federation Metadata Url and share this with your OneSchema representative.
- In Properties, confirm Assignment required? is set to Yes. Then, in Users and groups, assign the users or groups who should be able to log in to OneSchema. With assignment required, Entra ID blocks sign-in for users who are not assigned to the application.
Updated 14 days ago