
Getting Started
An overview of how to setup a OneSchema FileFeed.
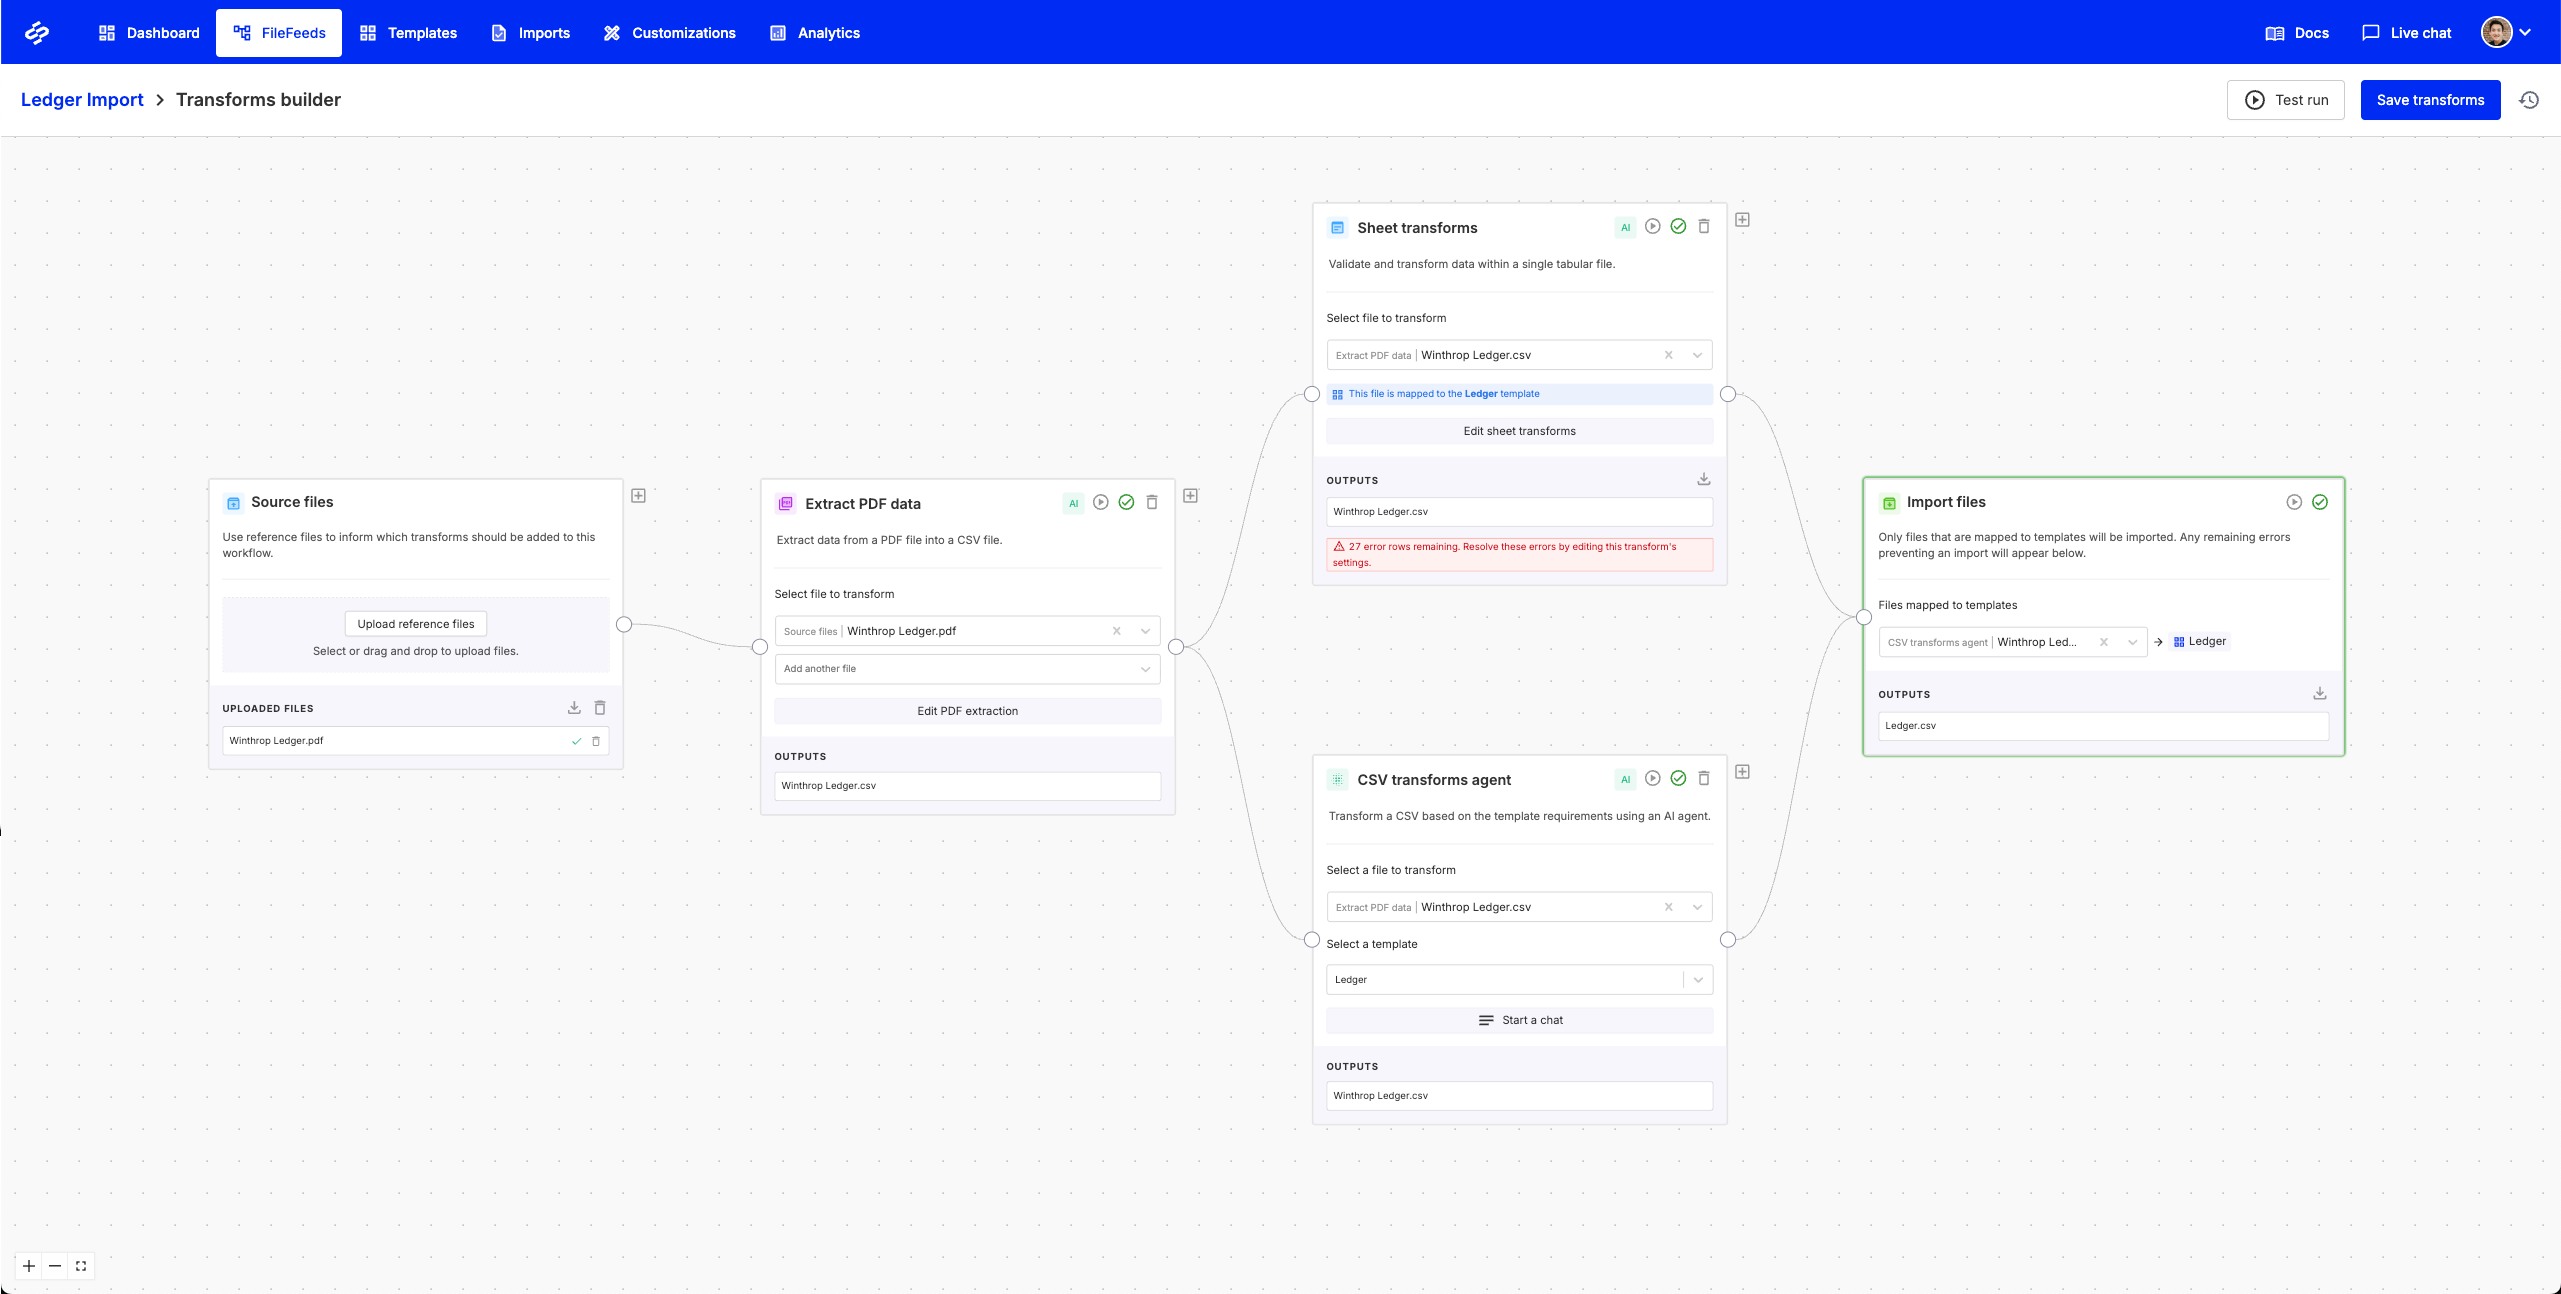
OneSchema FileFeeds is an AI-powered automation platform that saves customer implementation teams hours of time compared to manually cleaning Excel files and PDFs by hand.
A FileFeed can automate any manual file mapping, transformation, and validation process and has pre-built integrations with SFTP, S3, and APIs for full end to end automation.
To begin, request a demo if you have not yet done so.
FileFeeds are designed to empower your non-technical team members with an AI-powered data engineer. Accelerate customer onboarding and data ingestion, while saving your engineering team from maintaining brittle scripts.
Updated about 7 hours ago
What’s Next