Step 2: Creating a FileFeed
Use the right settings for your specific FileFeed configuration
Navigating to create a FileFeed
To create a FileFeed, first navigate to FileFeeds in the top navigation bar to view all of the FileFeeds that you have in your deployment.

From there, click the "Create a FileFeed" button in the top right corner of the screen, to begin the experience for creating your first FileFeed.

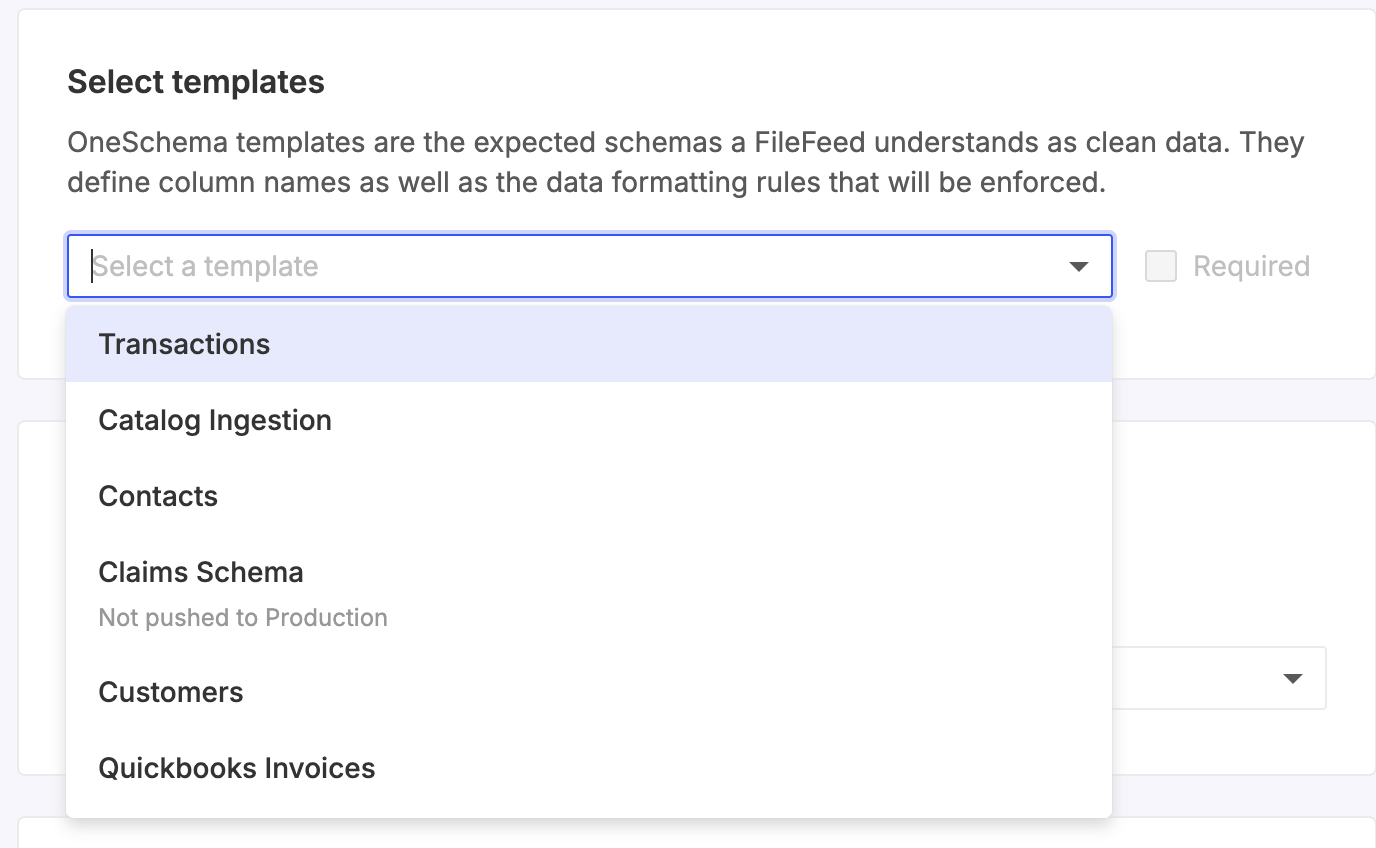
Attaching templates to a FileFeed
Multiple templates can be attached to a FileFeed, and they are used to define the validation rules that govern the destination of your FileFeed. Check to make sure that the template you want to use is pushed to Production. Only templates that are in Production can be used with a FileFeed.
If you mark a template as "Required", that template must have a valid CSV loaded into it as part of your FileFeed in order for a given FileFeed run to be successful.
Source and Destination Connections
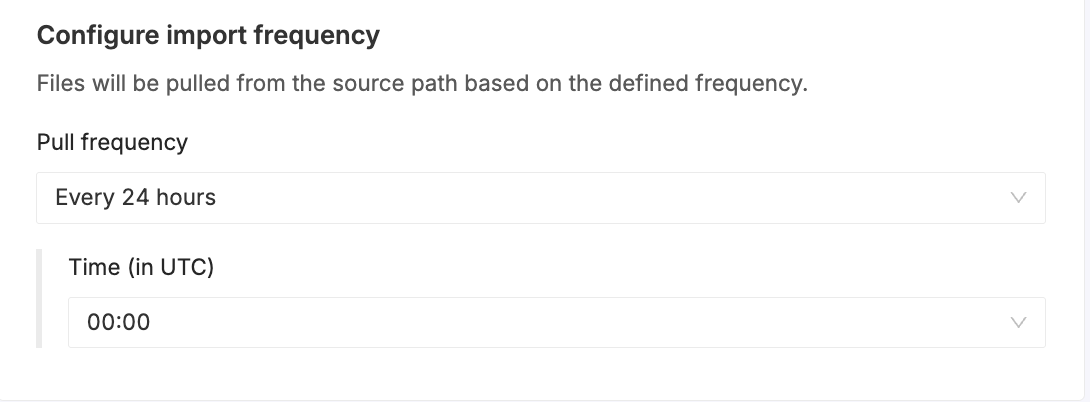
Source and destination connectors for FileFeeds can be SFTP or API. S3 and Email connectors are coming soon. Source and destination connectors can be configured with an import frequency (e.g daily or hourly) for pulling, and API based connections can also run based on a trigger, e.g via a lambda function.

Post-validation transforms
OneSchema default outputs validated data as a JSON or CSV that conforms to the column keys and order specified in your OneSchema template. However, there are cases where the data you want in your destination could be a different format, e.g TXT or XML, or a different structure from your template. In these cases, simply add a Post-validation transform to your FileFeed to encode the transformation that takes the template output to your desired format.
Updated 19 days ago