
Step 3: Using the Transform Builder
The transform builder is the most powerful part of the FileFeeds experience.
Navigating to the Transform Builder
Find the transform builder in the top right corner of your FileFeed runs page by looking for this button. Accessing the transform builder will take you to the canvas.

Understanding the canvas
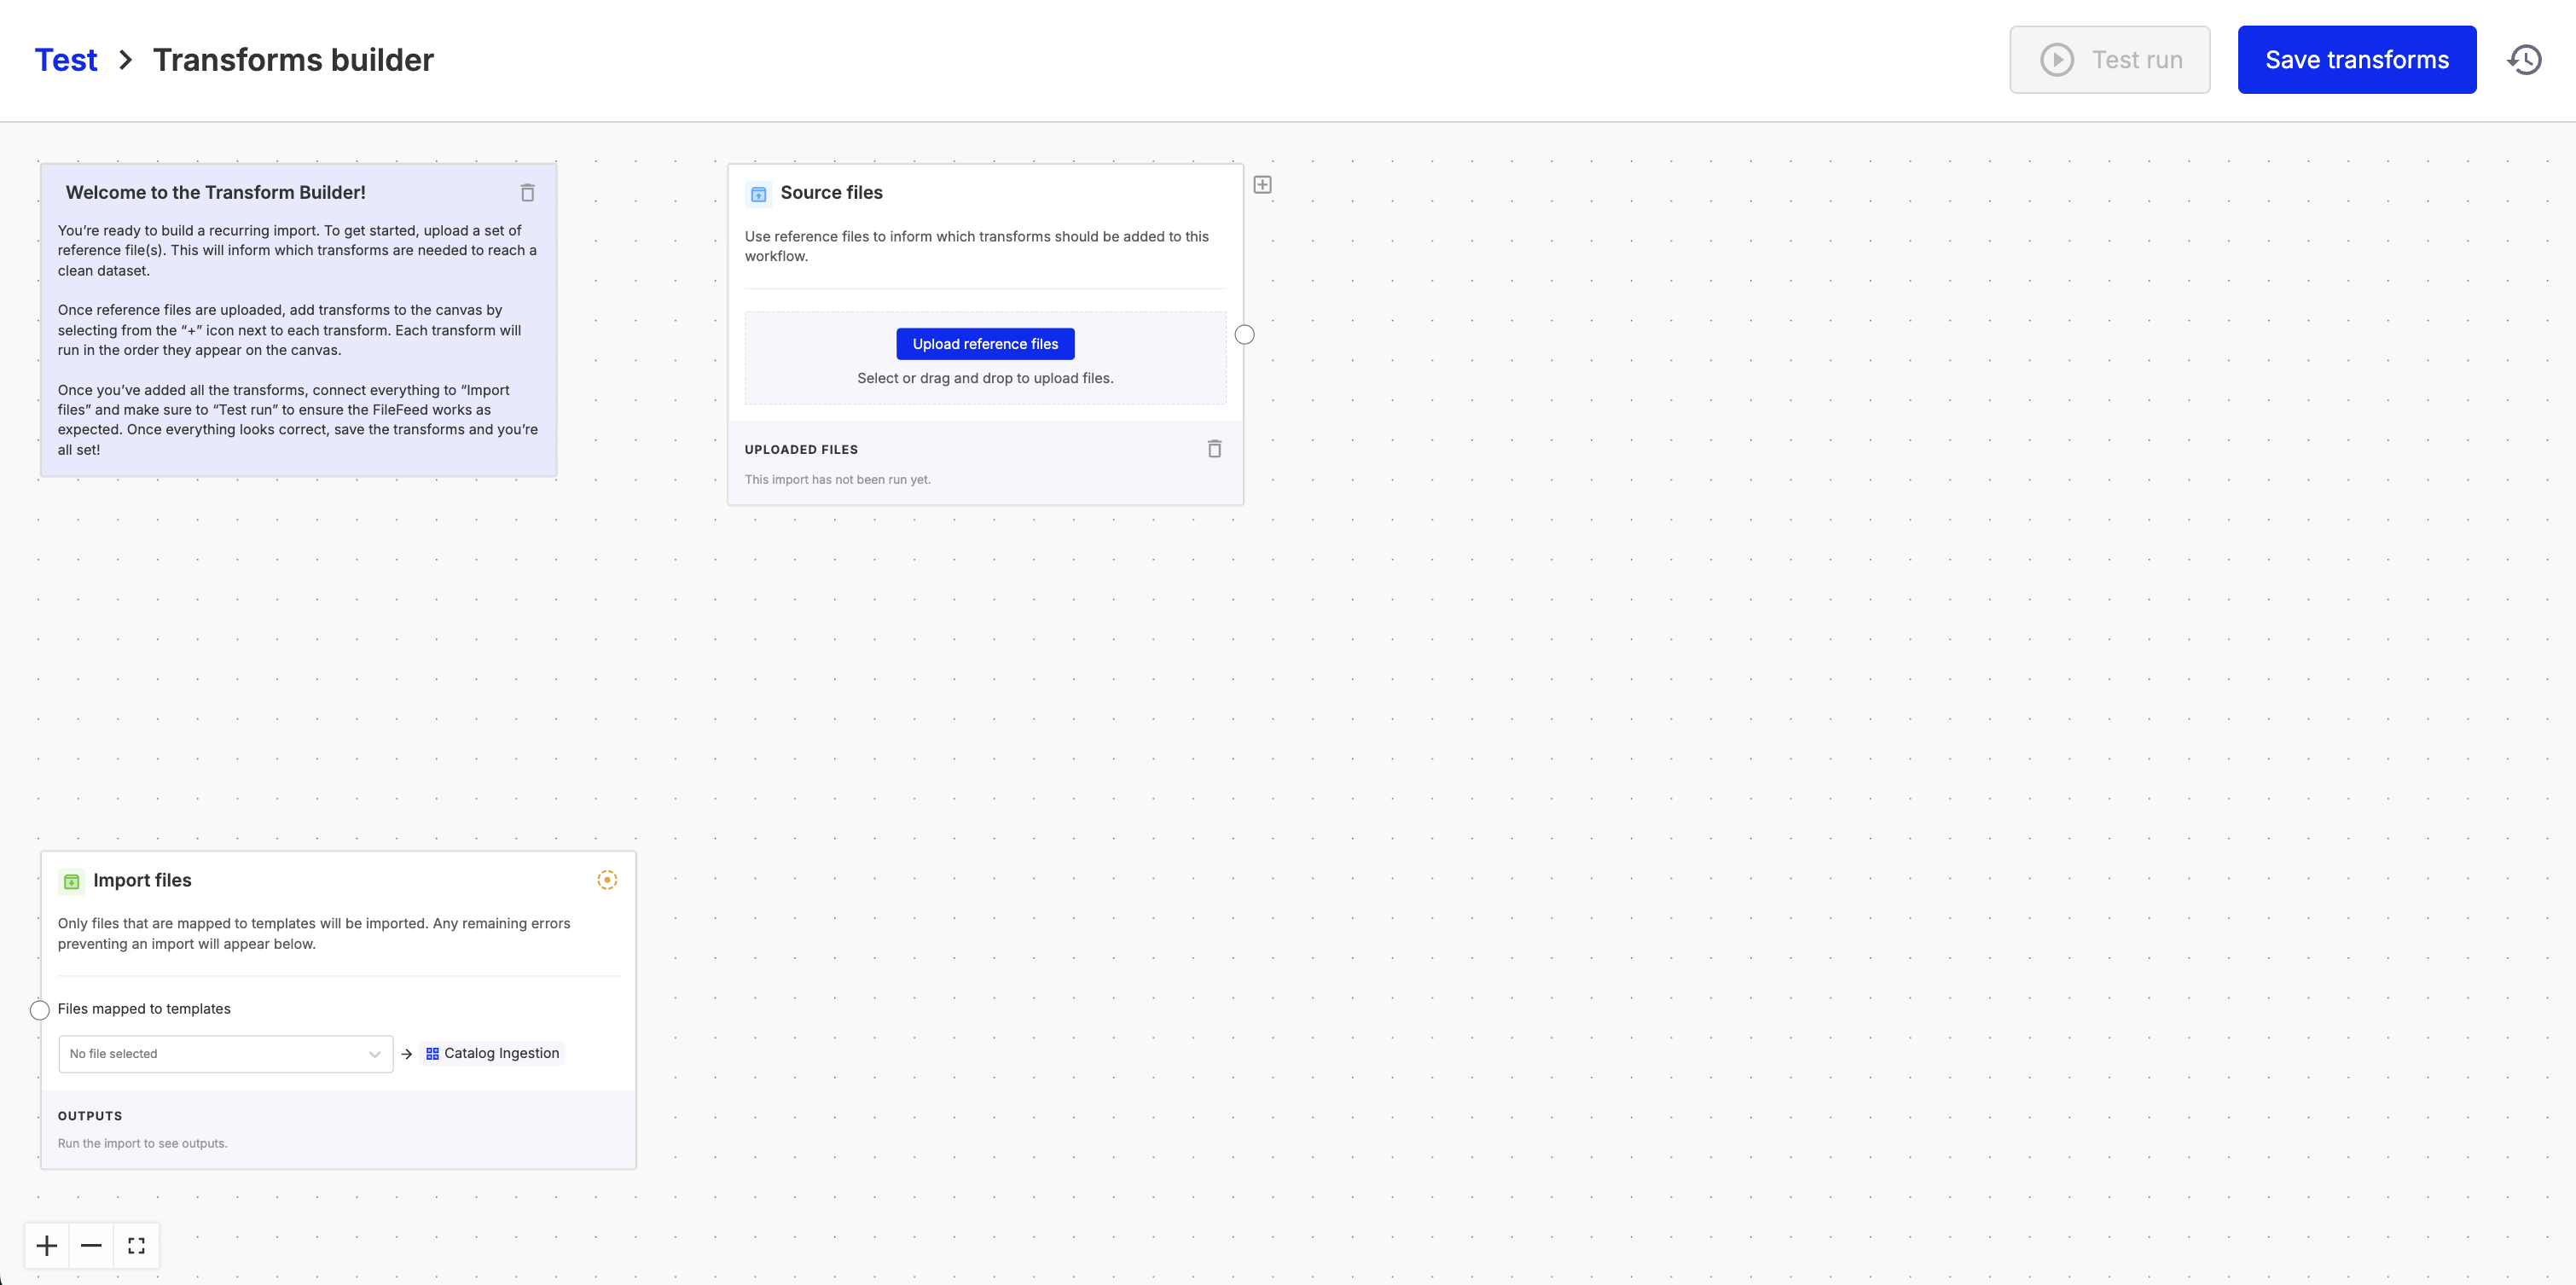
The transform builder canvas allows you to define a flexible transformation path for files entering the FileFeed. Files always begin at Source files and end at Import files. That is why these two blocks are available from the moment you create your FileFeed.
Uploading reference files
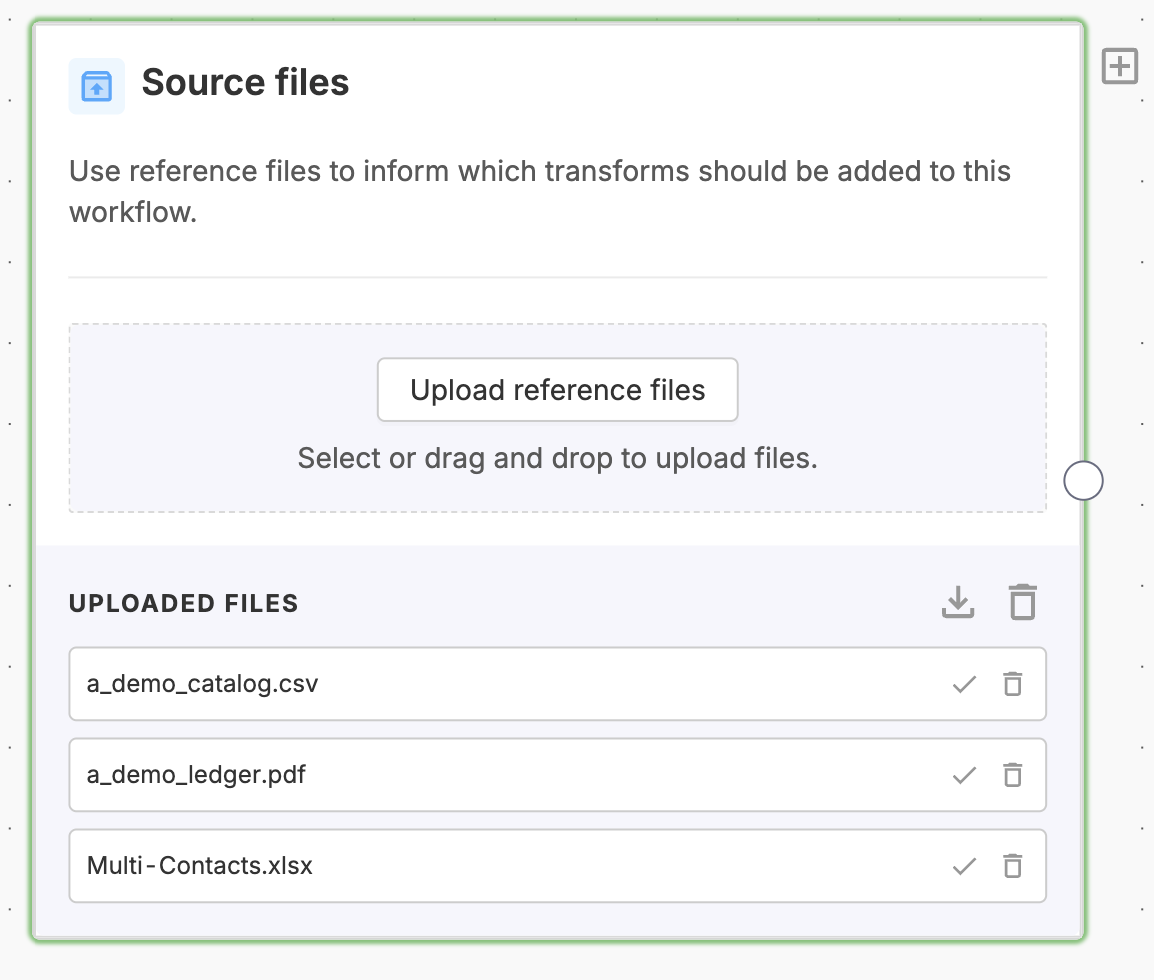
Reference files are always uploaded in Source files and they are critical for building a FileFeed. The reference file is a messy file that we want to transform into clean data for importing. Most importantly, the file gives us a reference to help us define all future transformations in our FileFeed.
More than one file can be uploaded, and they do not have to be a specific file type. OneSchema supports all file types, CSV, PDF, XLSX, JSON, DOCX, etc.
Adding a transform
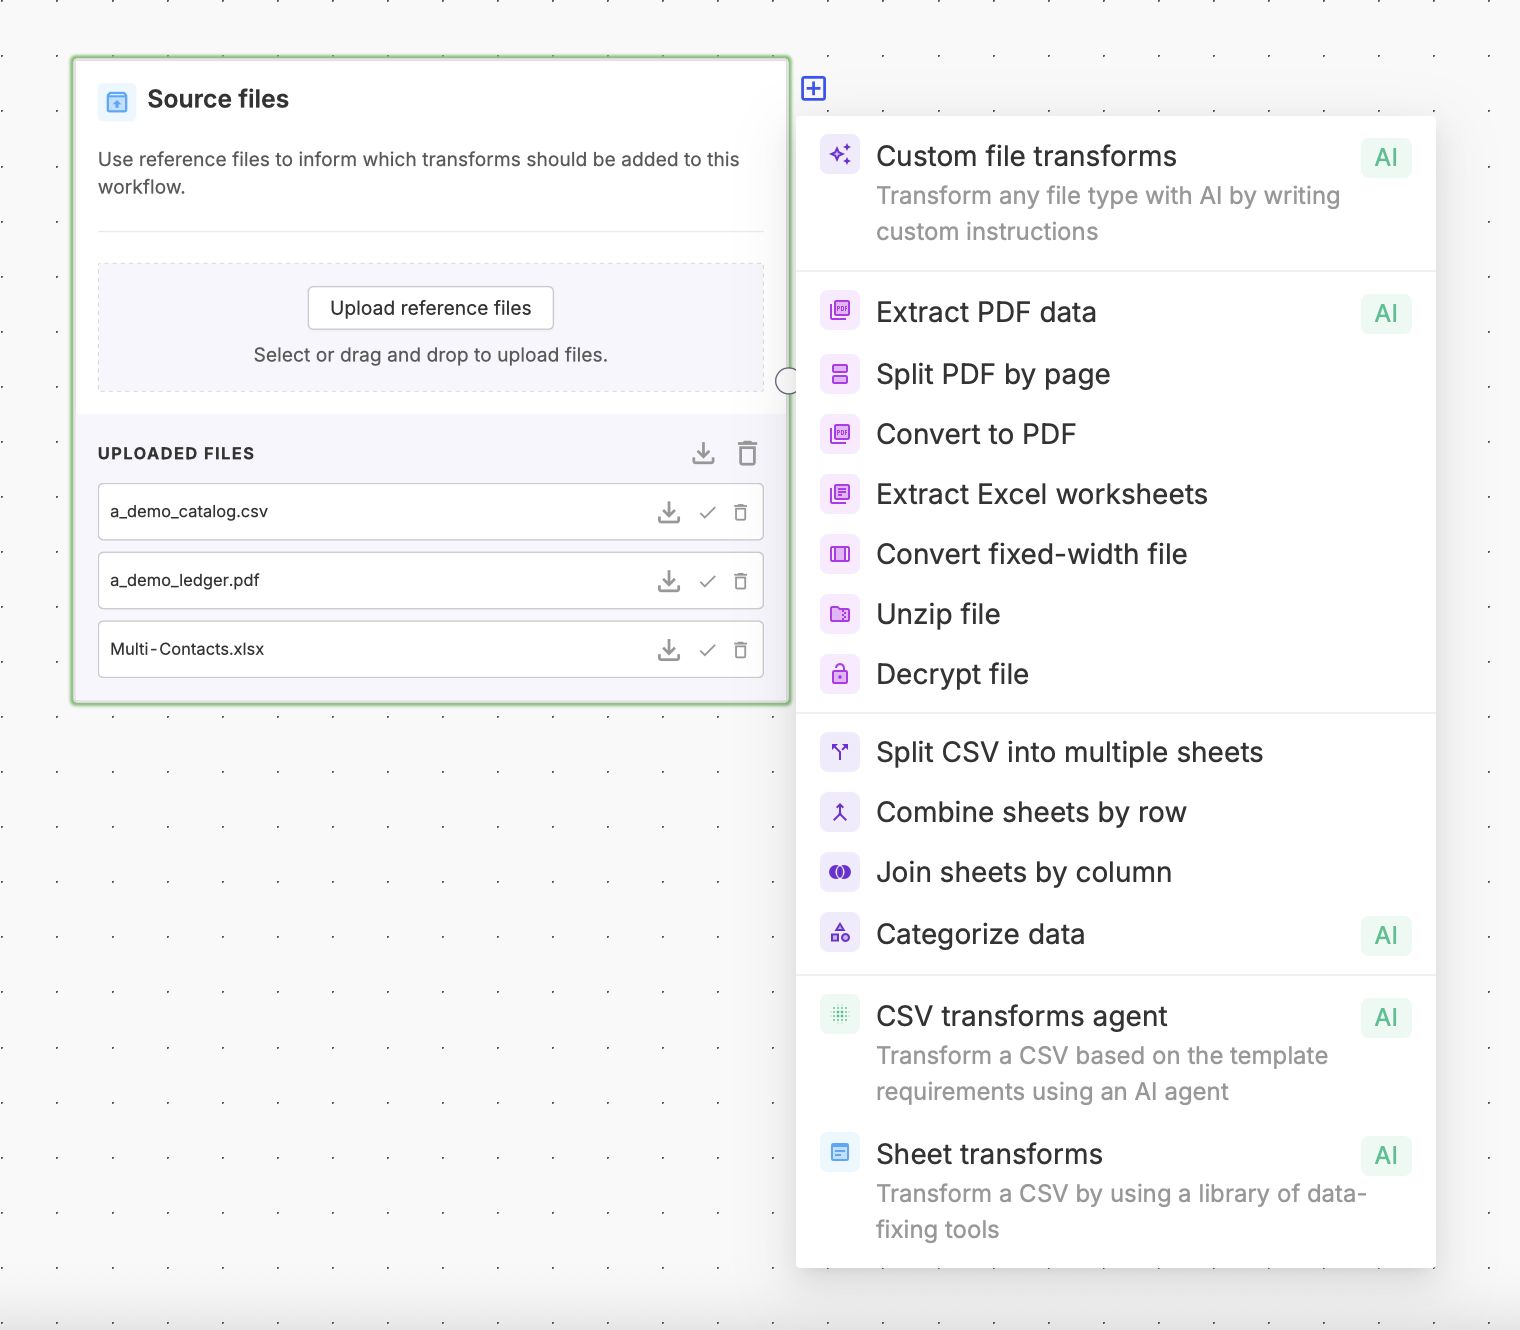
In order to build the path between Source files and Import files, hover the plus icon in the top right corner of a block to access the transforms menu. Our entire library of blocks ranging from Extract PDF data to Custom file transform and Sheet transform are all available as blocks for you to add.
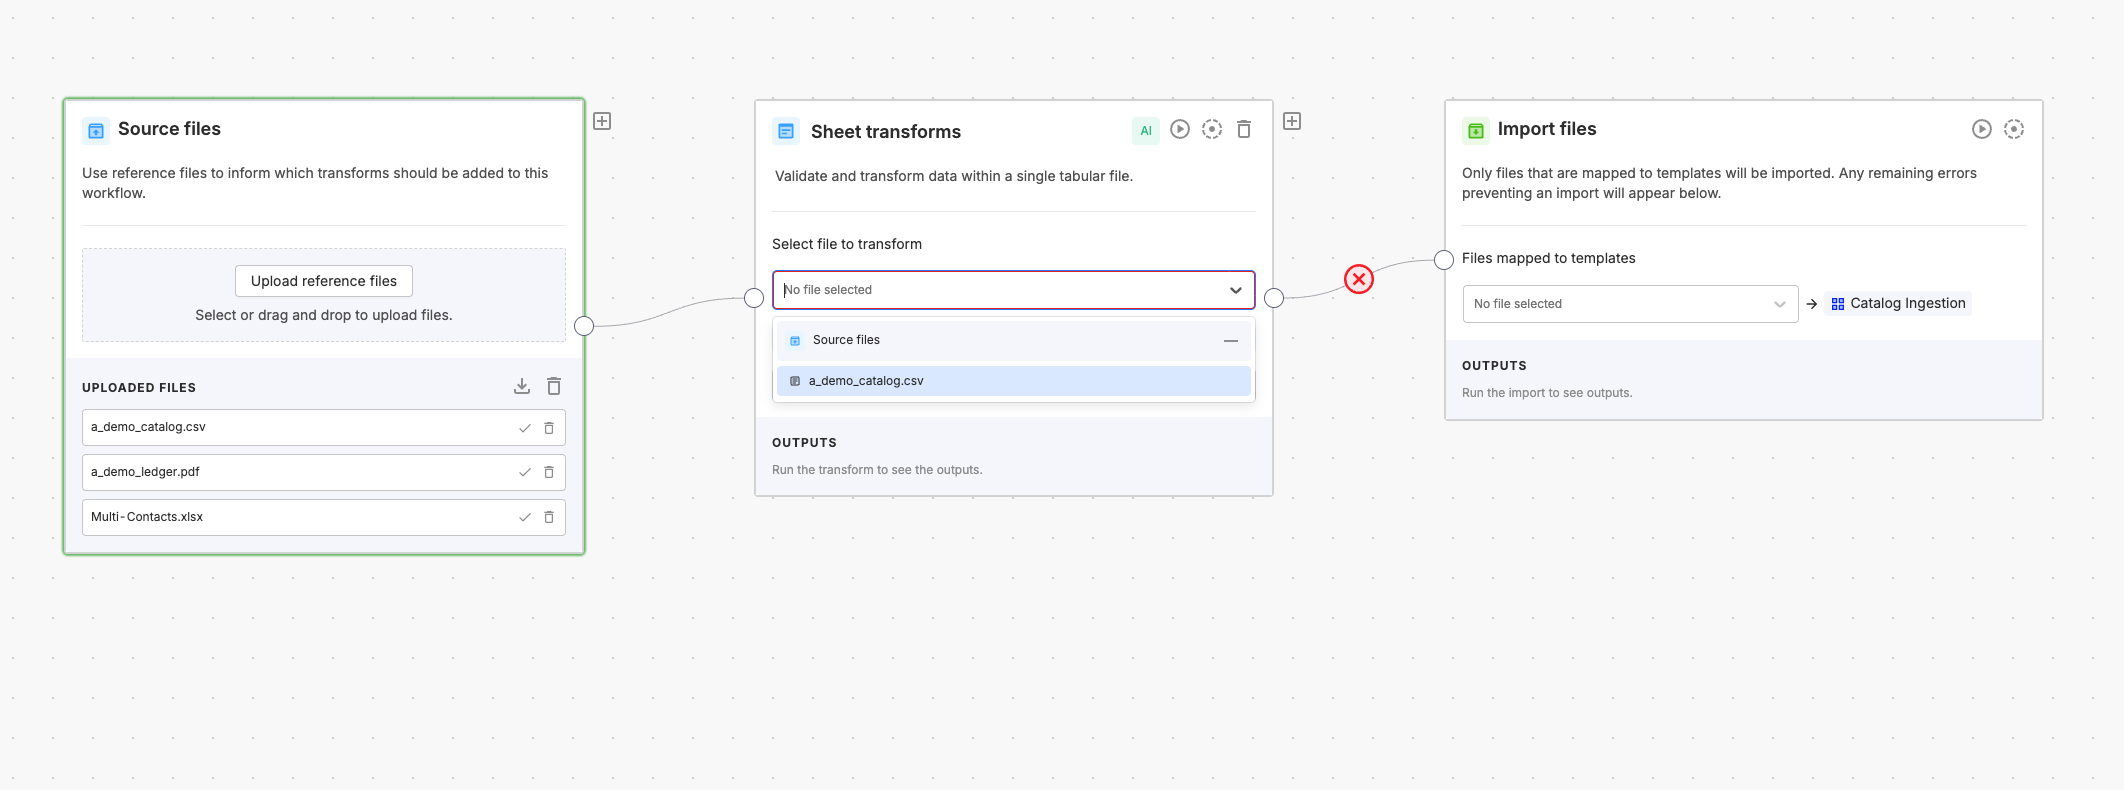
After adding a block, notice that there will be an edge that connects the two blocks. When two blocks are connected, the dropdown for Select file to transform in the UI will display files that are available from previous blocks that are connected in the canvas.
If you would like to disconnect two blocks, simply hover your cursor over the connecting edge, and a red X will appear, enabling you to disconnect the blocks. To reconnect, simply drag a new edge from the circles on the left / right of any block.
Filtering input files by name
When an upstream transform produces more than one file, you can choose which files a downstream transform receives by name instead of selecting a single file or a single file extension. This option is available on most transforms that support multiple input files; a few transforms, such as Validate files, accept multiple inputs but do not support name-based filtering.
- After adding a transform, open the Select file to transform dropdown and choose Filter files by name…, if it is available.
- Choose a filter type:
- ends with matches file names that end with the pattern. Use this for suffixes such as
.clean.csvor.errors.csv. - contains matches file names that include the pattern anywhere. Use this for mid-name terms such as
reportor.clean.. - matches regex matches file names against a regular expression. For example,
.*\.csv$matches any file whose name ends in.csv.
- ends with matches file names that end with the pattern. Use this for suffixes such as
- Enter the pattern to match. Whitespace is not trimmed, so leading or trailing spaces in the pattern are matched literally.
- Check Skip files that match, instead of including them if you want the transform to receive every upstream file except the ones that match the pattern.
- Toggle Case-sensitive matching to control whether capitalization must match exactly. It is enabled by default.
The transform receives every upstream file whose name matches the filter. If no files match, the transform runs with no input files: many transforms fail the Multi FileFeed run with an input error, while others simply produce no output. The transform builder also shows a warning on the input when the filter currently matches no upstream files. Regex filters are validated but not previewed in the builder, so this warning always appears for matches regex filters even when files will match at run time.
Using the sheet transform
If you already have a file that is a CSV as the output of a transform, then most likely you'll want to use the sheet transform in order to map, transform, and validate that sheet against one of your output templates in the Import files block.
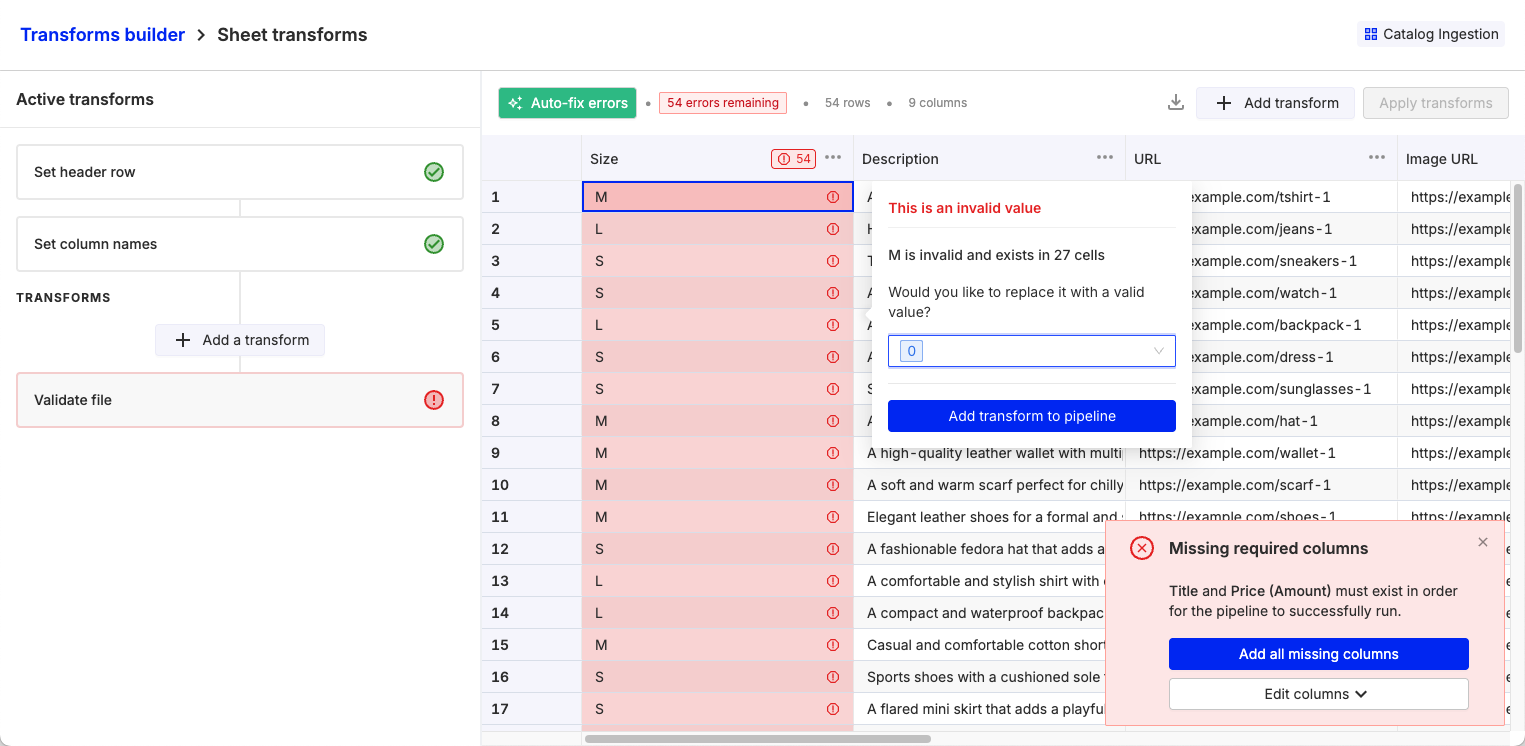
The sheet transform displays the validation errors between the template and the CSV / sheet that was used as the reference file. Clicking on the red cells will display an error message and also suggest transforms that can be added to the saved transforms on the left sidebar. Clicking "Add a transform" will also open the transform menu, allowing you to access AI transforms directly for cleaning the spreadsheet. Clicking "Auto-fix errors" will also apply default formatting fixes for dates, text casing, numbers, etc.
Using the custom file transform
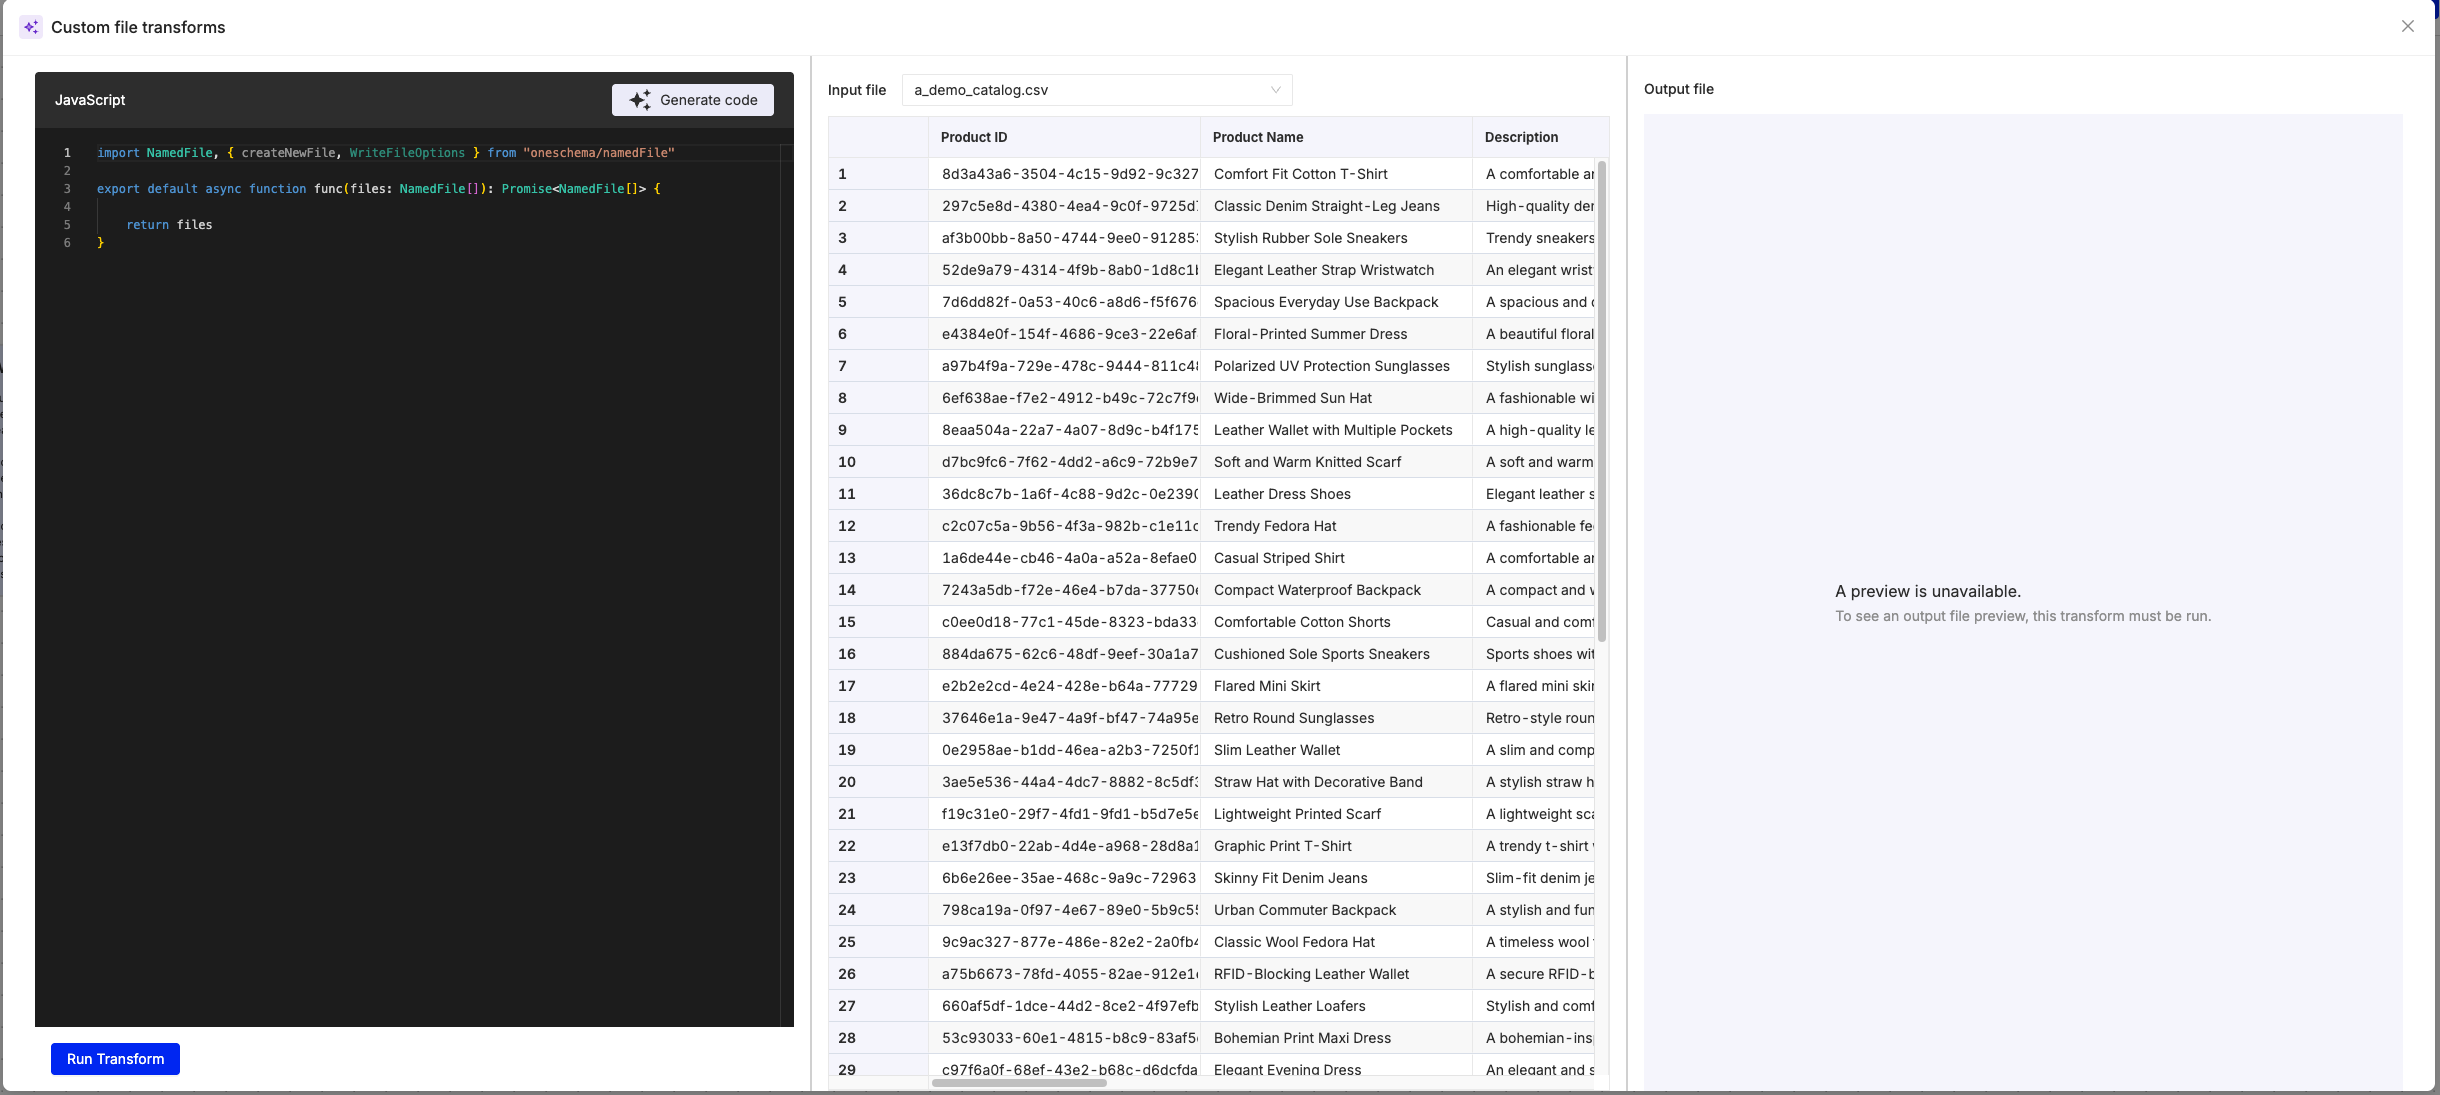
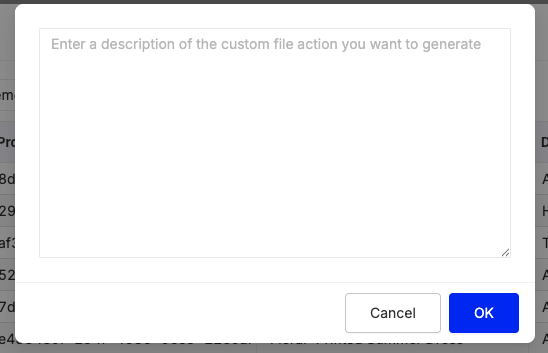
The custom file transform gives a user all the power of an AI-powered vibe coding experience. With just natural language, any non-technical user can create file transforms for unzipping files, transposing columns and rows, converting XML files to CSVs, etc.
Custom file transforms are also very effective for dealing with nested data in CSVs, especially when cells are merged together, or multiple tables are present on the same spreadsheet.
Using the extract PDF transform
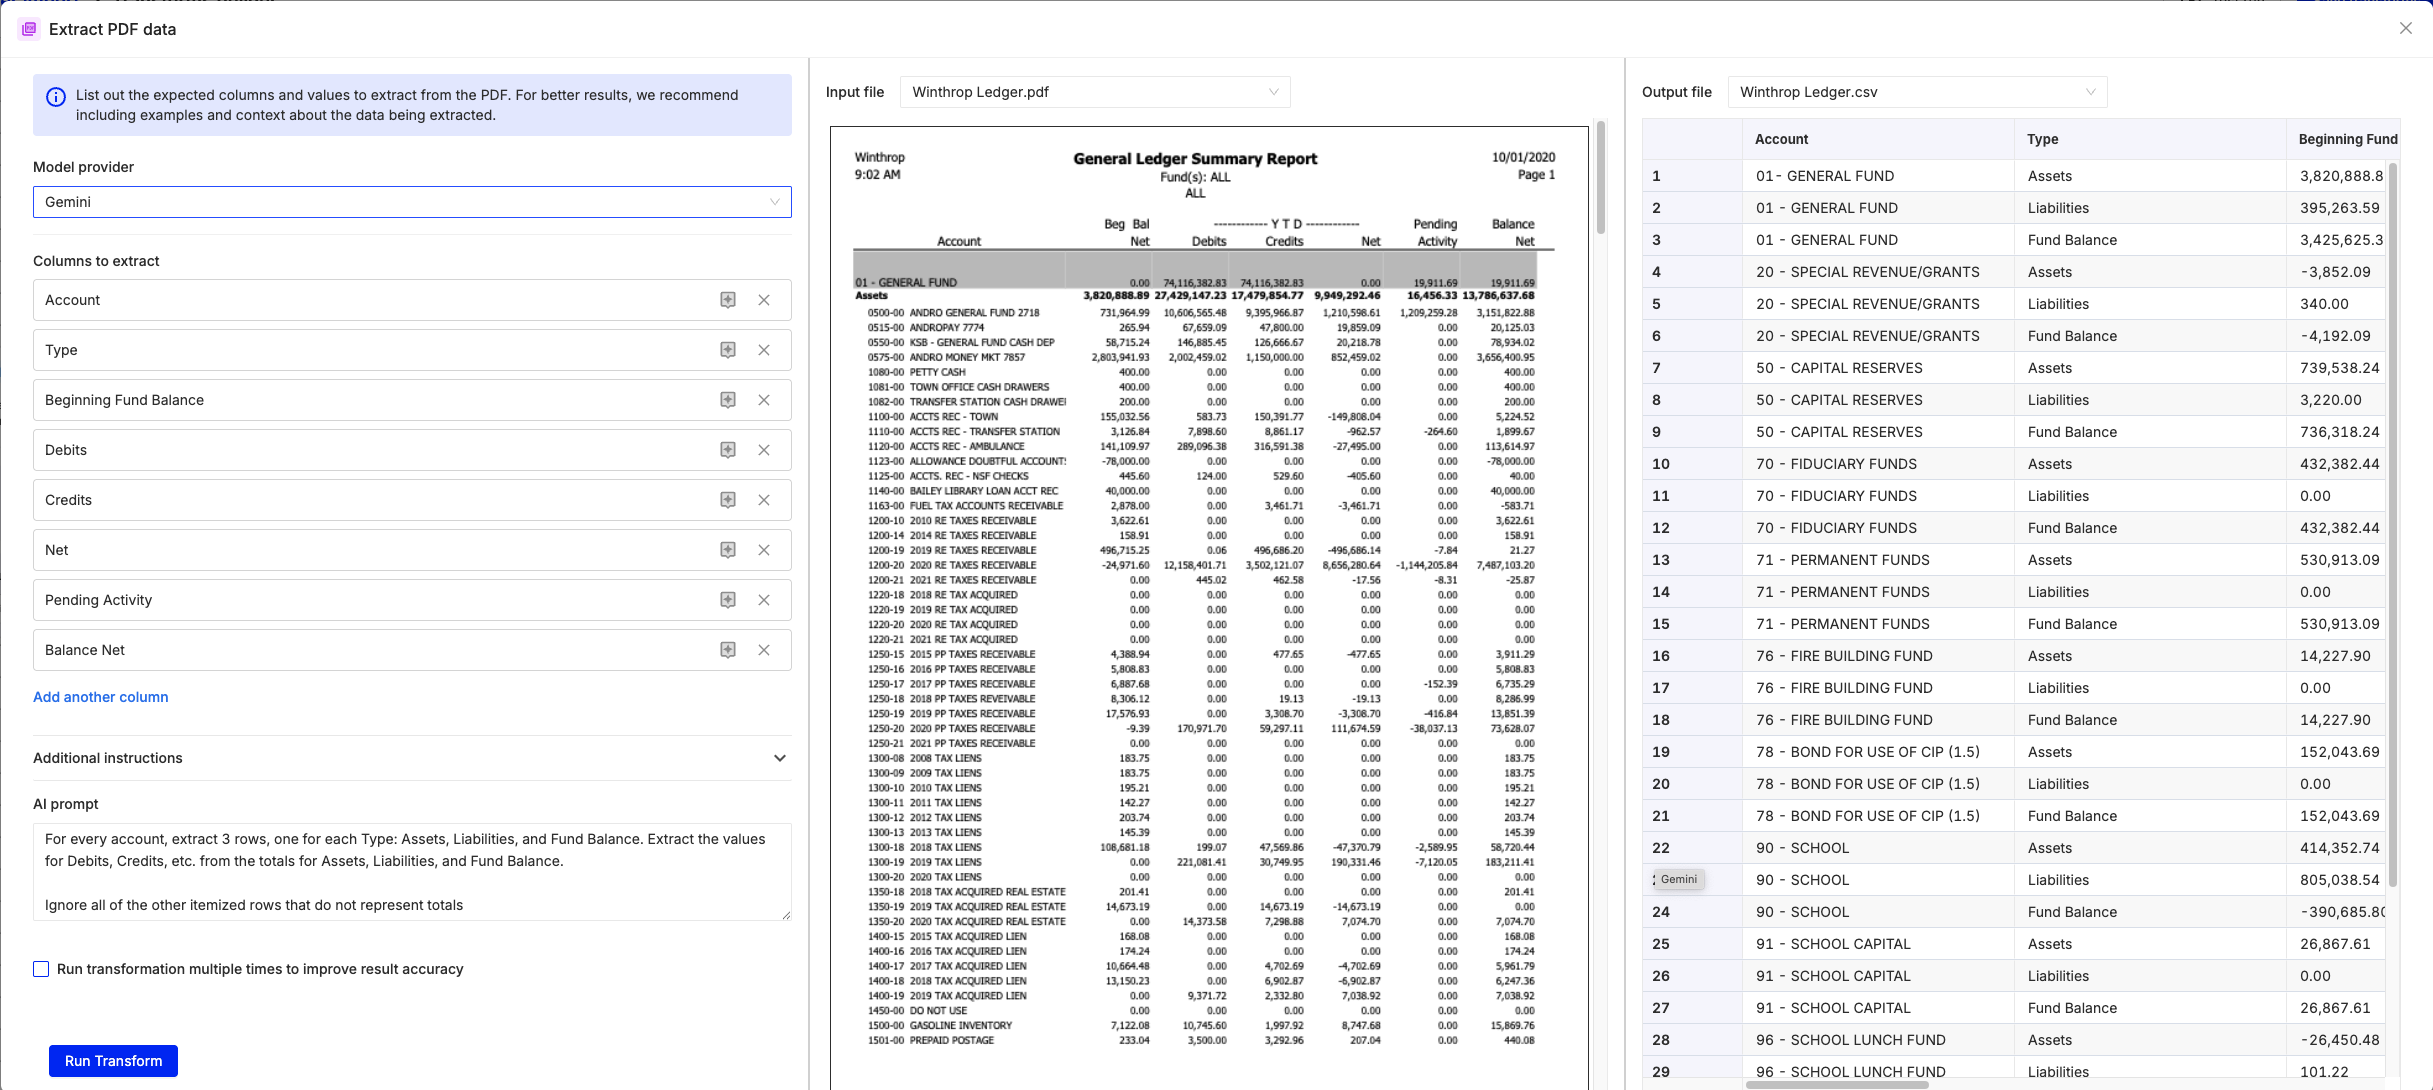
The extract PDF transform allows you to extract structured data from any PDF, image, or word document. We offer a choice of AI models as well as an easy to use extraction UI. Simply define the headers you are looking for and AI will handle the rest.
For sensitive data where accuracy is paramount, the "Run transformation multiple times" feature allows you to have multiple LLMs run and validate the output to protect against inaccuracies resulting from hallucinations.
Using the CSV transform agent
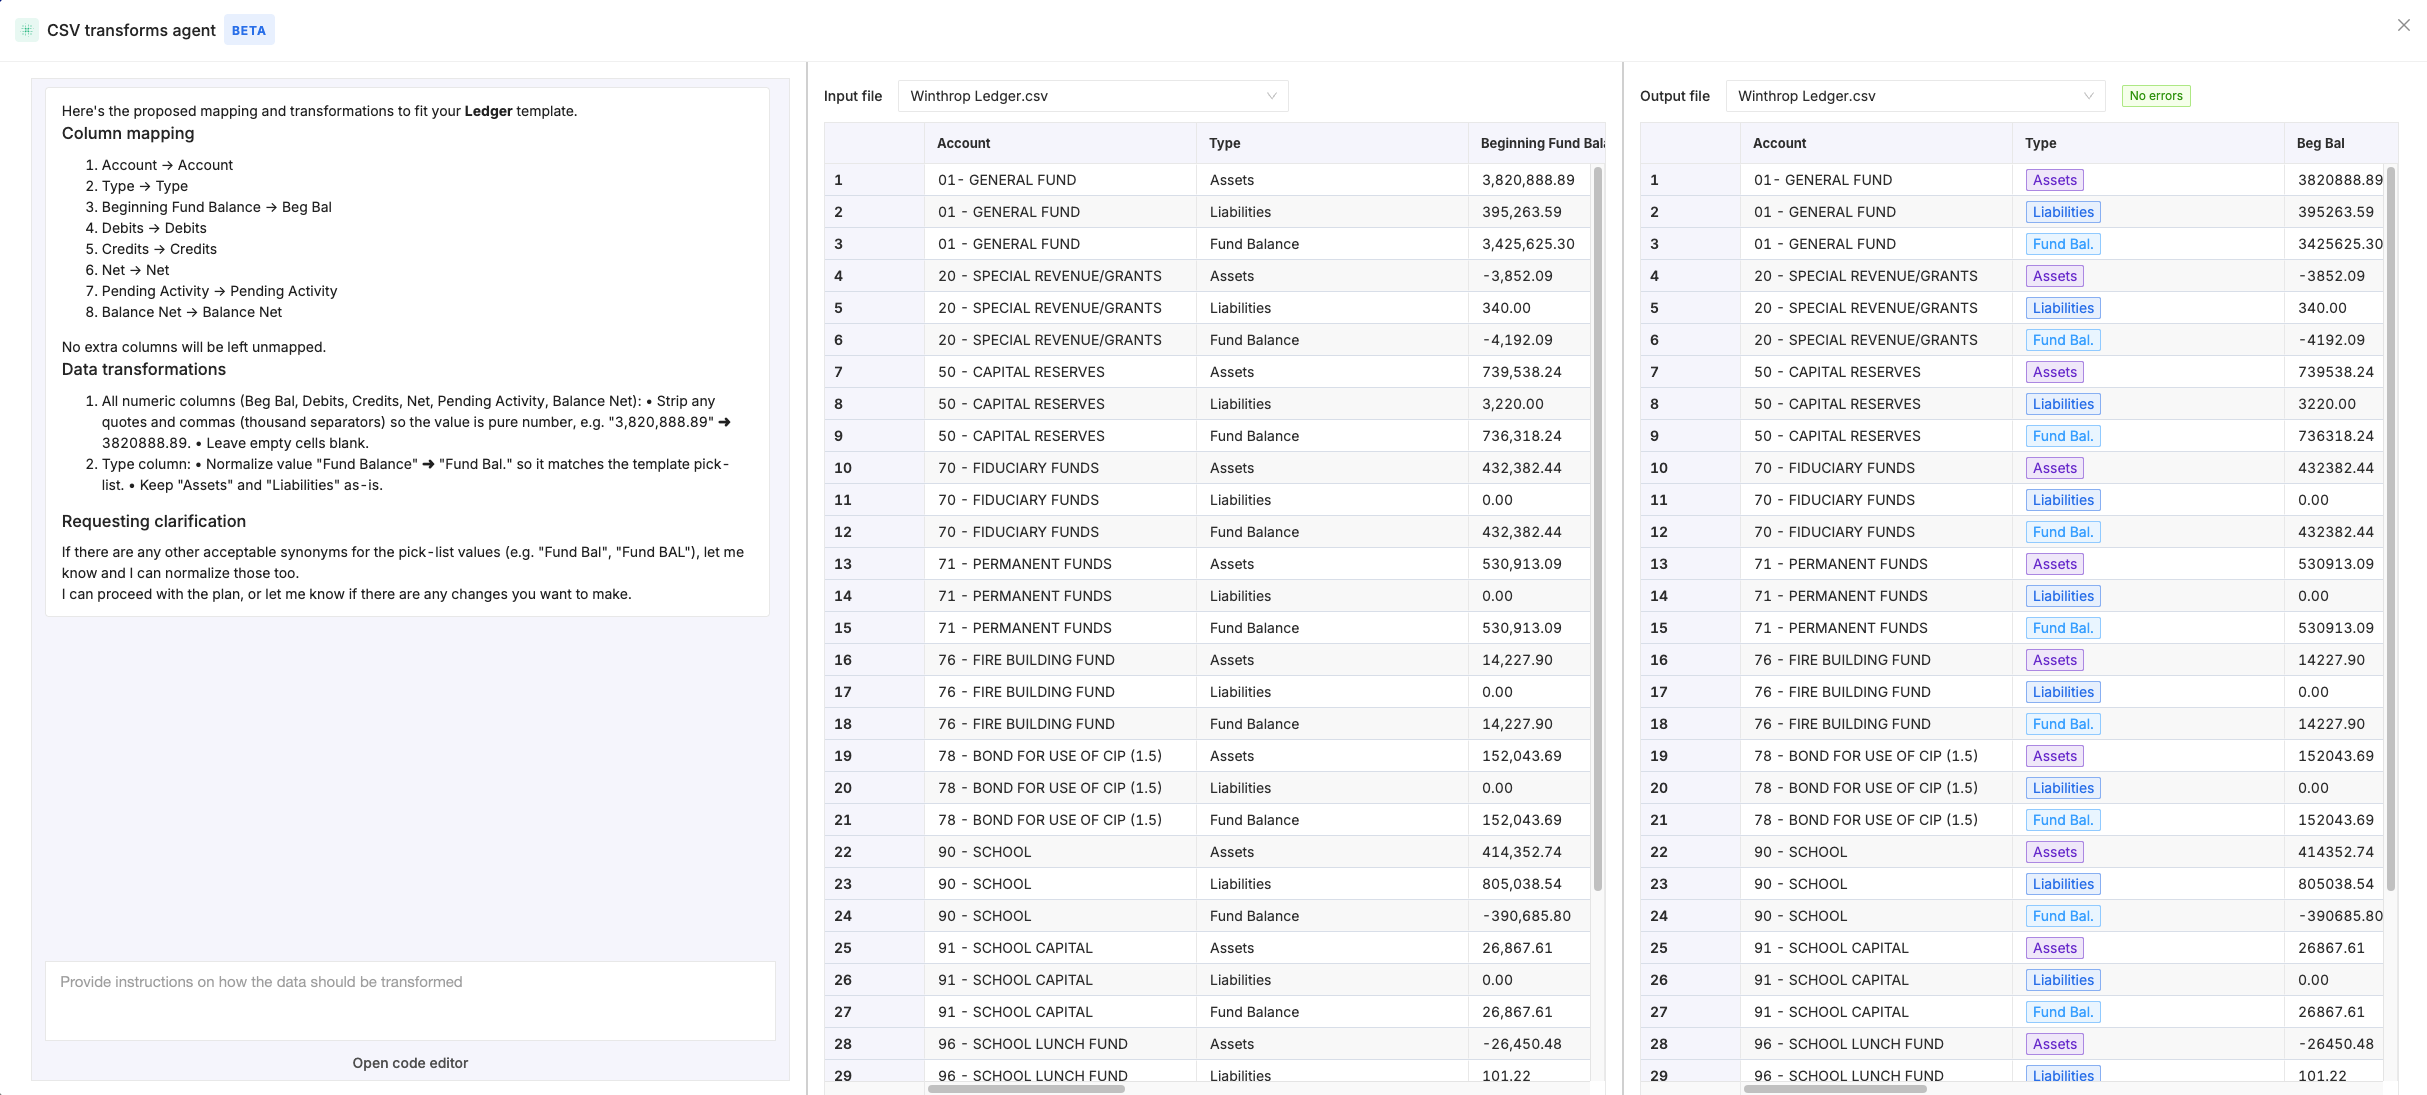
The CSV transform agent will intelligently suggest column mappings, data transforms, and work with you to ask clarification questions to generate an all-encompassing data transform script, customized for cleaning your CSV or spreadsheet.
The CSV transform agent is in BETA, and currently has a limit of supporting spreadsheets up to 300 rows.
Updated 2 months ago