Build your first Multi FileFeed
A five-minute end-to-end walkthrough that takes you from a sample CSV to a working Multi FileFeed with validated output.
This guide takes a single messy CSV and walks you through the full Multi FileFeed lifecycle: define your output schema, create the MFF, let the agent infer the transforms, run it, and inspect the clean output. You won't write a single mapping rule by hand. Plan on about five minutes if you're starting from scratch.
If you haven't yet, request a demo so your organization is set up with access to Multi FileFeeds.
What you'll build
A Multi FileFeed that accepts a customer's contacts CSV (with messy column names, inconsistent date formats, and a few stray rows) and produces a validated payload that conforms to a clean Contacts template. The agent does the heavy lifting: it reads your template and a sample file, infers the right column mappings and cleanup transforms, and only pulls you in for the rows or fields it can't confidently handle.
Prerequisites
- A OneSchema account with Admin or Developer role.
- A sample CSV to work with. If you don't have one handy, any spreadsheet of contacts with a name, email, phone, and date-of-birth column will do.
Step 1: Create your output template
Templates are your output schema. They define the columns, types, and validation rules that clean data must satisfy.
- Click Templates in the top navigation.
- Click New template in the upper right.
- Choose Build a template from scratch (or From a clean spreadsheet if you have a pre-cleaned sample; OneSchema will infer the columns and types).
- Name the template
Contactsand give it a key likecontacts. - Add the columns you want, with the rules you want enforced (required, unique, type, format, …).
- Push the template to Production so it's available for your MFF to use.
For deeper coverage of templates (column options, validations), see the Templates concept page.
Step 2: Create the Multi FileFeed
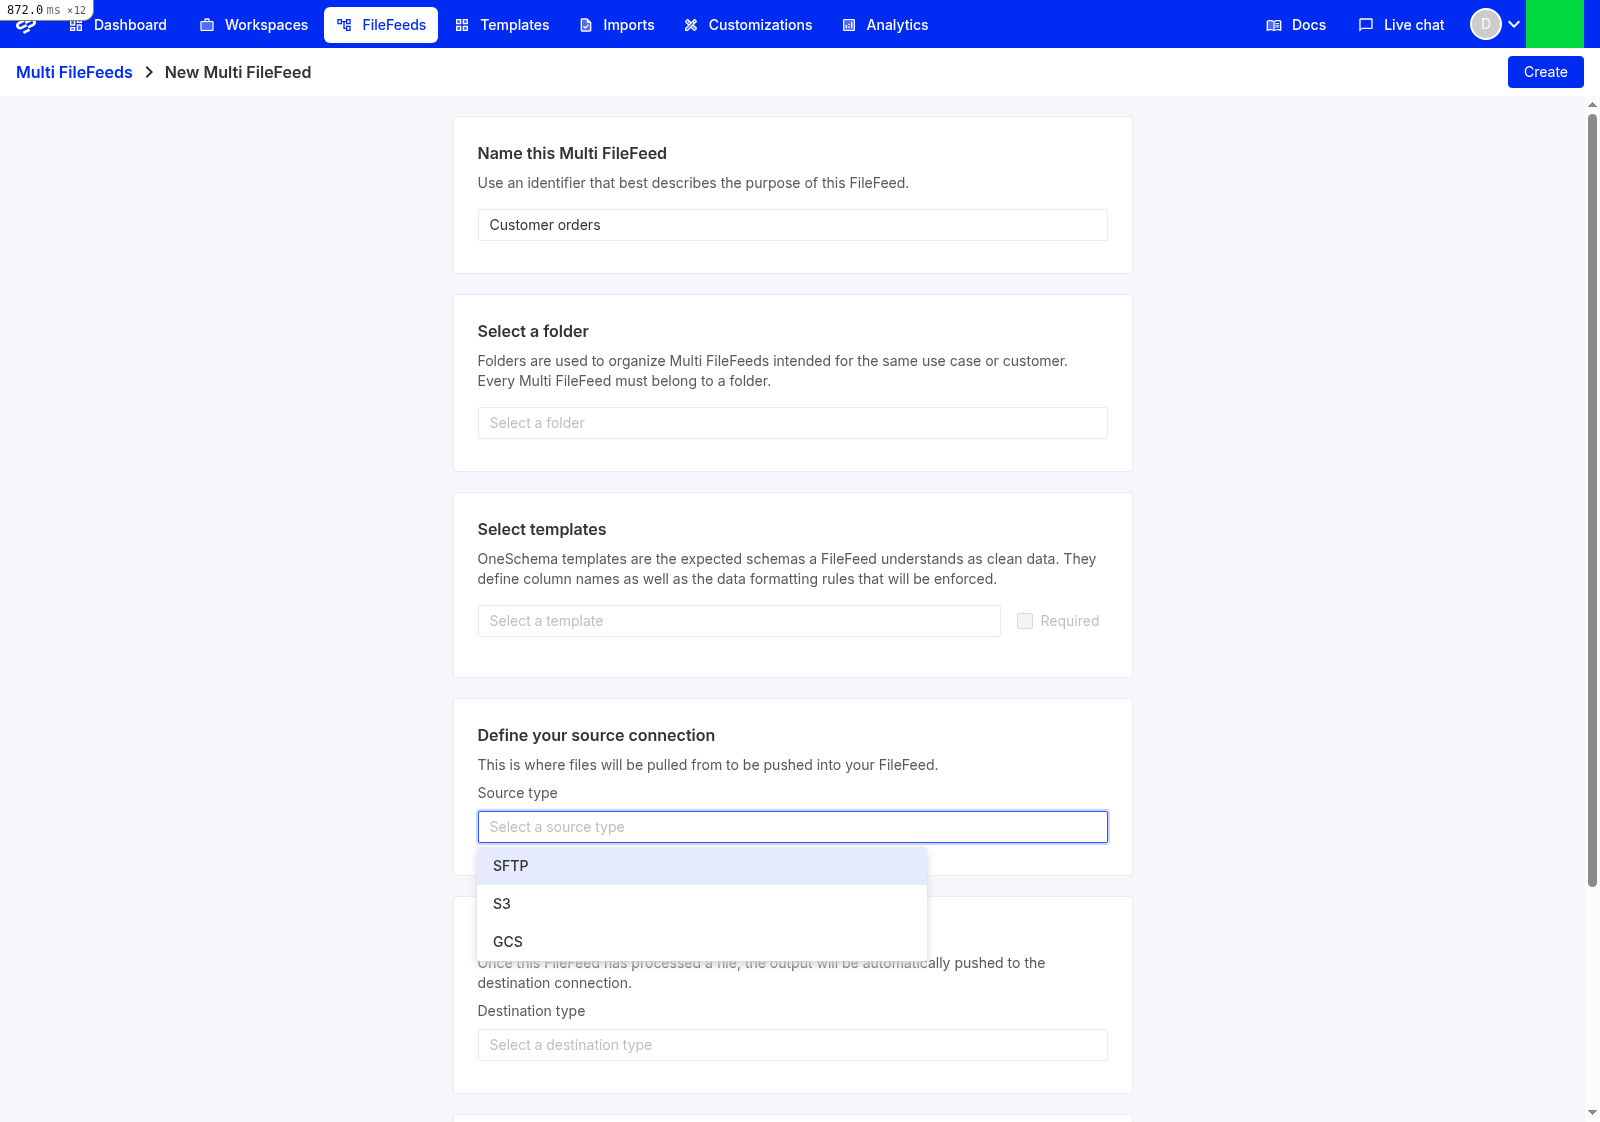
- Click FileFeeds in the top navigation.
- Click Create a FileFeed in the upper right.
- Attach the
Contactstemplate you just published, and mark it Required so the MFF can't complete without it. - Pick a source connection. For your first MFF, Manual upload is the simplest; you can swap it for SFTP, S3, or API later. See Bringing files in for the full list.
- Skip the destination connection for now (you can run the MFF and inspect output in the dashboard without one).
- Save.
Step 3: Let the agent build the transforms
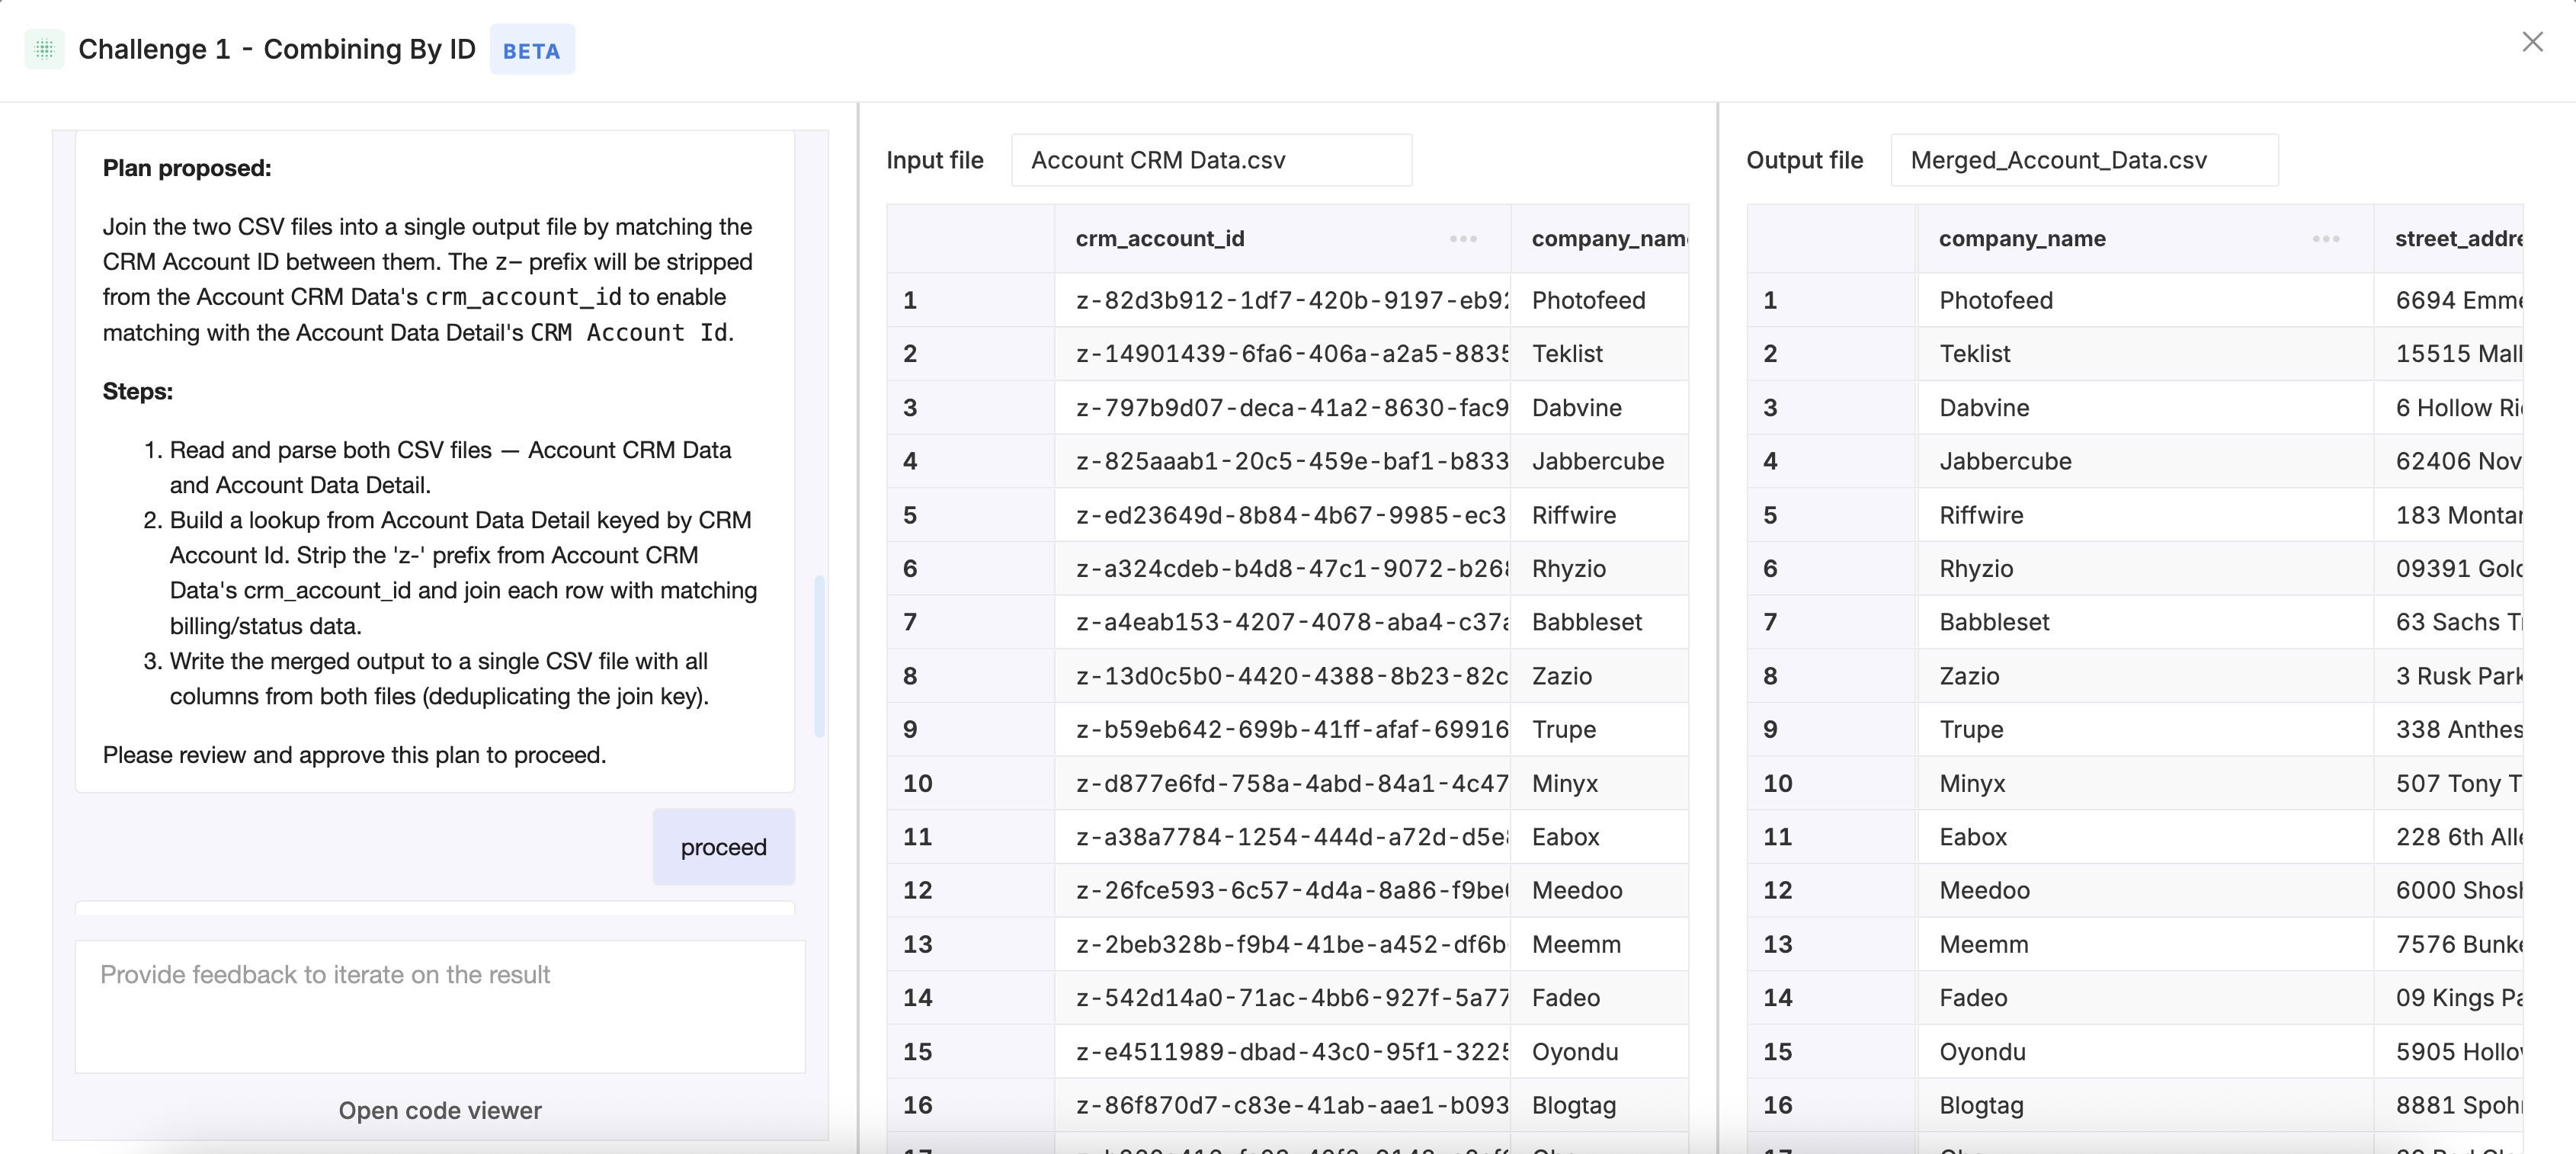
This is where the transform builder comes in. You'll see two transforms already on the canvas (Source files on the left and Import files on the right) with no connection between them yet. You won't be wiring transforms by hand: the agent will propose the entire chain for you.
- Upload a reference file to Source files. Use a messy version of the contacts data, exactly the kind of file the MFF will receive in production. The agent uses this file (alongside your template) to learn what real customer input looks like.
- Point the Source files output at Import files with the
Contactstemplate as the target. The agent then reads your template, scans the reference file, and proposes the full chain of transforms it needs (header normalization, type coercion, value cleanup, taxonomy mapping, error fixes) without you specifying any of them up front. - Review what the agent inferred. Each proposed transform shows a before/after diff so you can see exactly what it's doing. Accept the chain to commit it to your saved transforms, or click any single suggestion to tweak it before accepting.
- The agent only pulls you in for the rows or fields it can't confidently handle: ambiguous columns, novel values, anything that falls outside what your template can describe. Everything it's already confident about is applied silently. Every action lands in a transparent, observable run history.
For a deeper tour of what the agent can express in transforms, see The transform library.
Step 4: Save and run
- Click Save to create a saved version of your transforms. This is the version that runs in production. Unsaved changes don't run.
- From the FileFeed's runs page, click Create import, upload a fresh test file, and submit it.
- Open the run to inspect the output. Successful rows show up under the imported data; rejected rows are surfaced with a per-cell explanation.
What's next
- Connect a real source so files flow in automatically: Bringing files in.
- Wire up a destination so OneSchema delivers the clean output to your app: Delivering outputs.
- Promote your MFF across environments and put it on a schedule: Running Multi FileFeeds in production.
- Get a complete picture of what you can express in transforms: The transform library.